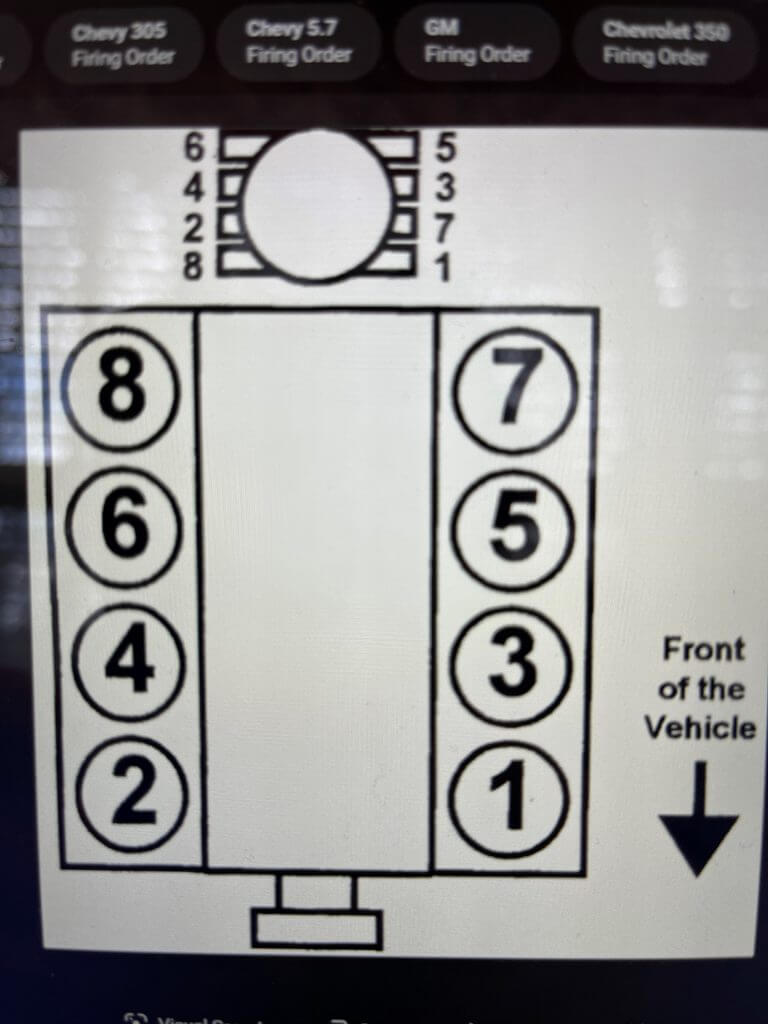
2007 Sea Ray 210 Select Firing Order 
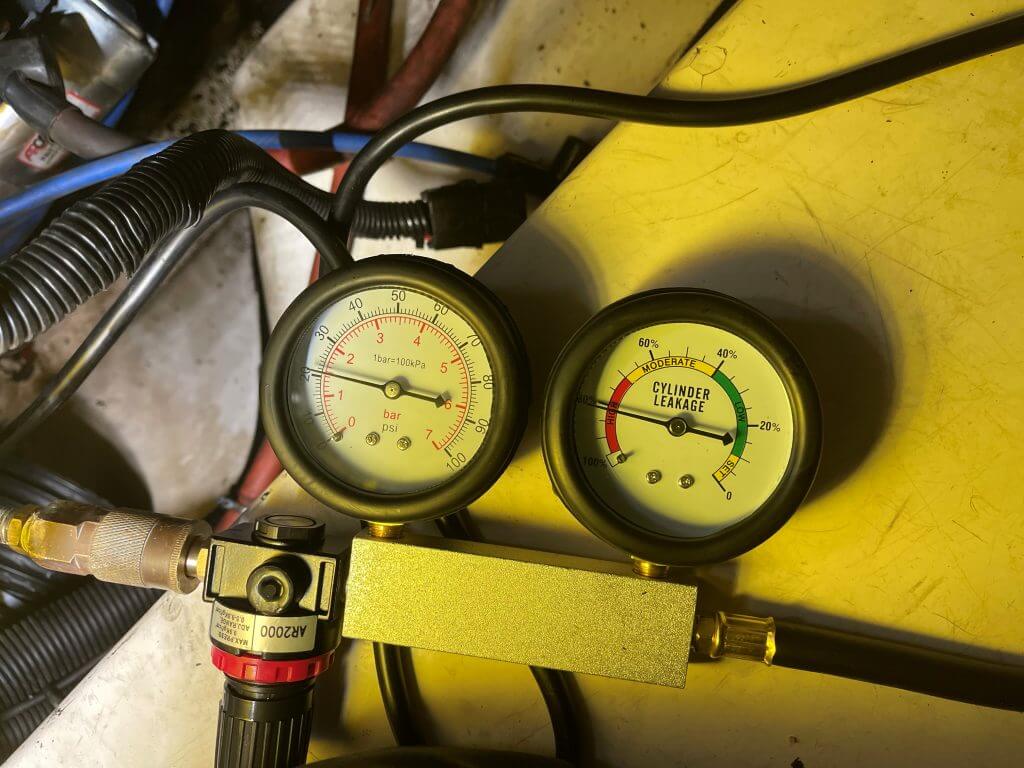
Cylinder Leak Down Tester
Here is how we Perform a Leak Down Test
So after pulling the plugs and inspecting them as outlined in a previous post. Now we are going through the process of how to perform a cylinder leak down test. I have never worked on an engine with this many cylinders so this should be interesting!
Everything With this Boat Is a Struggle
I have found that working on this boat is is a lot more difficult than working on than a Sea Doo. There does not appear to be a single place to find parts and knowledge about these boats. It seems that Sea Ray only builds the hull and sources everything else to others like Mercury Marine. Everything here seems to be a struggle to find what the parts are and where to get them. The part numbers in the Sea Ray service manual don’t reference to anything that can be searched.
Where to Find Information
It’s really difficult to find information, but I’m making slow progress. I’m going to focus on the engine for now and I have found those manuals. They are readily available for free. look around at Manual Libs, I’ll also post a few links on the resource webpage to where I have found information. There are also forums, like Iboats to. You are going to need to leverage these resources if you are going to take on a project like this. There are also a lot of moments where the reality of what I’m attempting to tackle seems more that I can deal with. Like all the wiring is corroded. There is no easy fix for this other than running all new wiring.
How to preform a leak down test will be simple, Right ?
So as the title in the blog entry alludes to this is how to perform a leak down test. I will say that the key to getting through any of this is following a process of troubleshooting. It really applies anything, not just this boat. It’s likely not usually something overly complex, its usually simple. Finally , on to preforming the leak down test!

So this was my 1st attempt at a leak down test. Apparently I have two of these. So, how can this be these first time? Still goes to my Raid one strategy for tools. I talked to my childhood best friend, Mark. I read a few things online and watched a few videos. To start make sure you have all the plugs pulled. This is so you won’t be fighting the compression in the other cylinders as you do the test. The idea was that the compressed air should push the piston down.
What Not to Do, Apparently it was not so simple!
So this is a quick lesson in what to and not do. First, hook the shop air to the gauges and use the adjuster / bleeder to get the right gauge in the “Set” range. Second, connect the other end to the cylinder and the leak down tester. I did not rotate the engine to top dead center on cylinder one. There a multitude of reasons as to why I didn’t. Apparently I can not find an alignment mark on the balancer that I can read. I’m also lazy and don’t want to pull the valve covers off, that will turn out to bite me in the end. So I started at Cylinder four, assuming there was a 50/50 chance I’m at the right position in the cycle.
So I guessed right Initially but that’s about it!
I guessed right, less than 20% in Four, Six, Eight. Then to Cylinder number Two. Then my heart stopped for a few moments then I decided to reflect on the situation and call my friend Mark. Told him I just heard lots of air whooshing. He suggested I put the air directly to see if it would rotated to Bottom Dead Center. It did not rotate. He also suggested I turn the engine by hand. I did not hear the engine rotate on any cylinder except on cylinder number four. I heard it move to Bottom Dead Center. There was an audible pop.
So Let try to get this right
So a grabbed my half inch breaker bar and rotated the engine, till I heard the a change in the air volume into the cylinder (it hissed less). The cylinder sealed up enough and it went into the green range for cylinder leakage. As I did this I had to fight the rotation and the air pressure.
This Engine is so large compared to what I work on
This is a big engine compared to what I work on. So I also tested this on one of my Rotax engines that I suspected was bad. It isn’t , all green for that engine for this one. It’s three cylinders vs eight. So rotate the engine till the hissing sound lessens or stops. It if never does, and the range is in the yellow or red it means there is a problem internally. I had less than twenty percent leak down. So apparently the engine is ok. Not perfect, but I’m not going for that. I may do a compression test later, but not now. A leak down test is more effective at determining where the problem lies (Intake Valves, Exhaust Valves, Head Gasket).