2005 Sea Doo RXT – Rotax 1503 SC 4 Tec Engine
So this is where it all started on the Journey of doing a Rotax 1503 SC 4 Tec Engine Rebuild. This is Oscar. As his name reflects his true personality. He has been problematic from the on-set. He has been my learning experience and clearly, it shows by the number of times I’ve been through the engine. Lots of lessons learned here. It’s not really his fault, it’s my lack of patience and forgetfulness during the Rotax 1503 SC 4 Tec Engine Rebuild process.
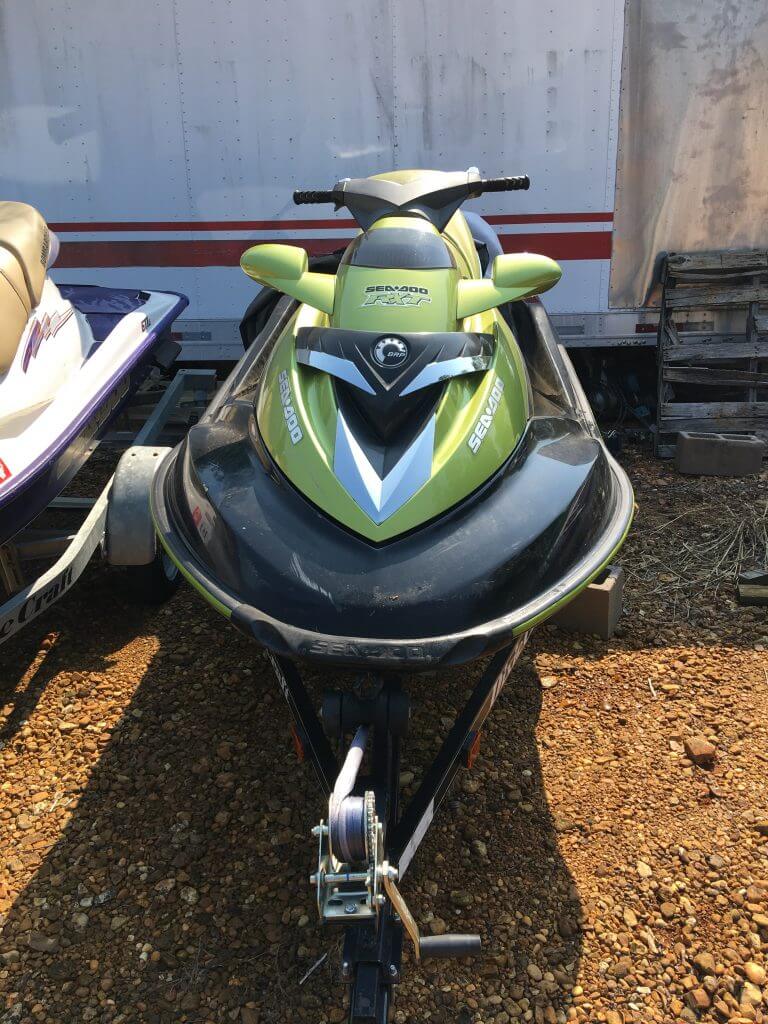
So, this is the first of the two skis I got from Jimmy. They are both powered by Rotax 1503 SC 4 Tec Engine. As part of the agreement, to get the bill of sale and these registered the understanding was I needed to show him these were in working order. Secondly, I had to purchase some specialty tools that I did not have at the time (Drive Shaft Removal Tool). Oscar was motor was locked up due to a supercharger failure. It’s a very common problem on these Skis. Make sure you check the supercharger every season and at the required intervals.
Rotax 1503 SC 4 Tec – Specific Oil
So first lesson! It is important to realize that these skis will only take very specific types of oil (Shell Rotella T6), Conventional or Semi-Synthetic. Not a full synthetic oil for these, ever unless it the T6 or a Motorcycle Synthetic! T6 Conforms to Rotella T6, 5W40, it is fully synthetic and JASO MA. There is a wet clutch and Other Fully Synthetics like Mobile One Synthetic won’t work on the Supercharged Engines. Hence, the 3rd rebuild I will find this out at the end of his second year. What happens is the clutch slips more and builds up heat as a result. The shaft, and causes premature bearing and washer failure. I would suspect this is also why Sea-Doo went to a Steel Washer Setup.
What is the difference in Rotax 1503 SC 4 Tec Engines
So the question is how to start on the Rotax 1503 Engine Rebuild process. Well, a little background is necessary about these engines! There are three possible Rotax 1503 motors that go in these Skis for 2003-2006. Additionally, I’ve outlined some of the differences between engines if you are searching for parts:
- 155 Horsepower Normally Aspirated Engine (Rotax 1503)
- Cast Flat Top Pistons (High Compression 10:1)
- Forged Crankshaft
- Four Valves Per cylinder
- Single Stator Gear
- 185 Horsepower Supercharged Engine (Rotax 1503 SC)
- Forged Dished Pistons (Lower Compression 8:1)
- Forged Crankshaft
- Four Valves Per cylinder
- Specific Fly Wheel for Supercharged engine
- 17 Tooth Double Stator Gear
- 215 Horsepower Supercharged Engine(Rotax 1503 SC HO)
- Forged Dished Pistons (Lower Compression 8:1)
- Forged Crankshaft
- Four Valves Per cylinder
- Specific Fly Wheel for Supercharged engine
- 16 Tooth Double Stator Gear
The reason why I bring this up is that if you are looking for parts, know that the block, crankshaft, Connecting rods, and heads are interchangeable.
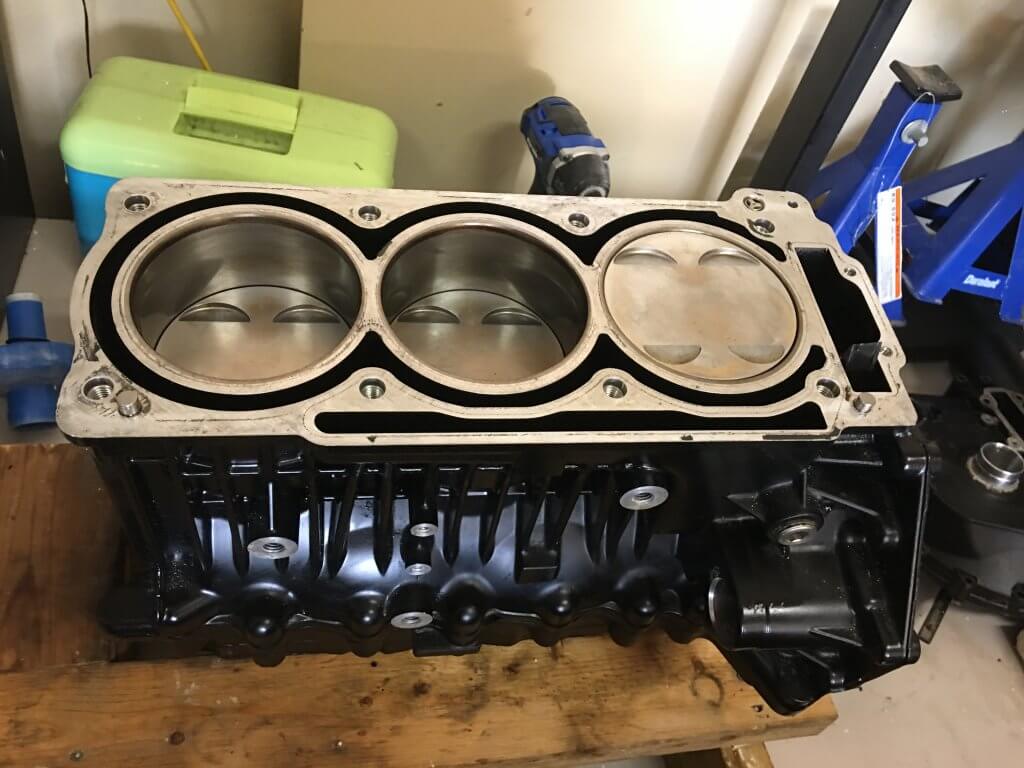
The Rotax 1503 – Split Case Design
To make it clear the block (Case) is the same regardless of the application. It took me a while to find a shop that would machine these blocks for me. I also had to purchase a hone plate. So, my 1st block came from eBay and 155 Ski. They are a split case design and require a boring plate to hone/bore these blocks out. You can not buy a bottom or upper case if something happens to the case. They are an aluminum block with cast iron inserts. You can press out the cylinder sleeves.
The Rotax 1503 – Overall Design
These motors operate at close to nine thousand RPM. It’s a dry-sump oiling system with two Gerotor oil pumps. There is a minimum deck clearance that has to be adhered to. Lastly, it’s a single overhead cam, dry-sump, fuel-injected, four-valve per cylinder, hydraulic lifter, counterbalanced crankshaft, and interference motor! This means if anything related to timing occurs there is going to be some damage.
Rotax 1503 SC 4 Tec Engine – Oiling System
So, the oiling system on these older skis is rather unique. But there are some things to be aware of about the overall design. It has is a front and rear oil pressure switches. But that is all that it is, a switch. It’s on or off depending on the RPM /PSI. The front switch triggers at 7PSI and the Rear at 30 (Closed to Open). Additionally, With this design, there is no oil pressure indicator or information to or from the ECU other than on or off.
In theory, the way the oil system works is if the rpm’s are below 2500 RPM the switch(s) are closed. If the RPMs are above 2500 RPM the switches are open. At higher RPM’s the oil pressure regulator runs in bypass mode. As a result, oil does not run through the oil filter. I believe that occurs as the engine RPM’s increase passes 4000 RPM. You could in theory have zero oil pressure and ruin an engine the way this system works. It’s a mystery as to the reasoning behind this design.
Oscar always seems to be grouchy. Oscar on the Third teardown gave me a low oil pressure warning going from wide open to closed throttle. What it took was using an external oil pressure gauge to figure out what was going on. As a result, it was a bad oil pressure bypass valve in the PTO, when it was all said and done. secondly, this took weeks to sort through this. The PTO’s are the same but there was a change in 2004-2005 where there is an additional spring. What happens at higher RPM’s the front oil pump bypasses the oil filter. I don’t particularly agree with the design, but I understand why they did it. They need more oil pressure than filtration. Lastly, I found it on a post on a forum!
Rotax 1503 SC 4 Tec Engine – Supercharger failure (Common Failure)
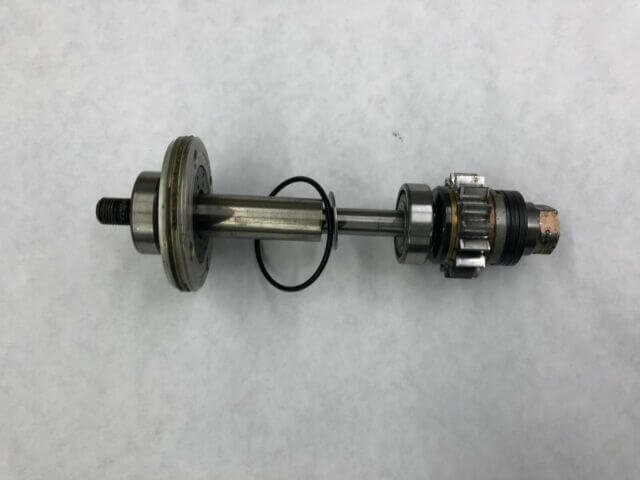
Good Supercharger Shaft 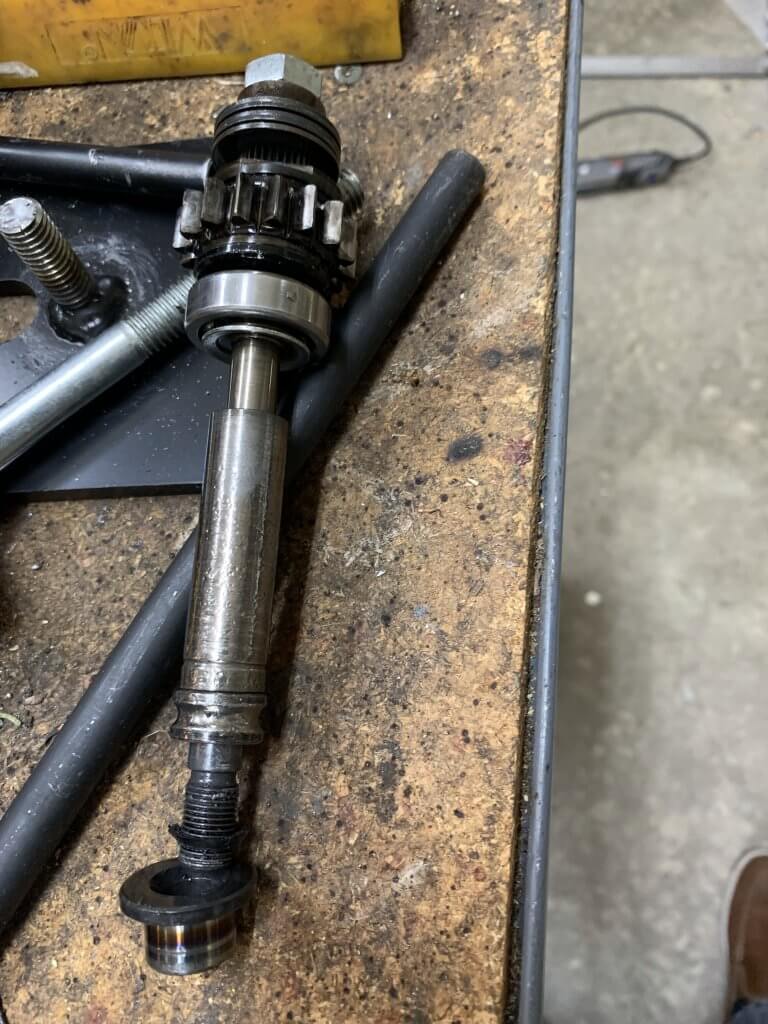
Failed Supercharger Shaft
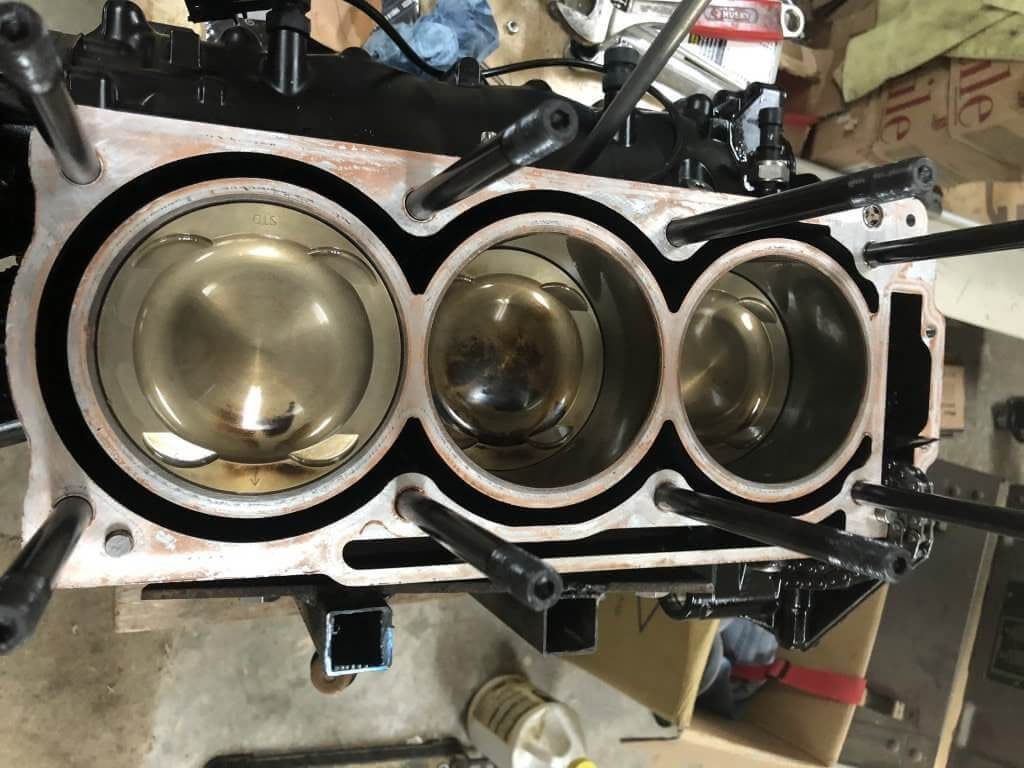
When I first acquired Oscar he had spun a main #2 and rod #2 bearing when the supercharger impeller disintegrated due to bearing failure. The main bearings were fused onto the crankshaft. There was little left of the rod bearings. There are front and rear oil pumps that push the oil into the number two cylinder. When there is a failure all of the material front gets pushed there. The block parts that were left useable were :
- Head and Valve’s (Will need to be Checked)
- Rear Oil Pump Housing (Rebuild Housing & Pump)
- Two Connecting Rods (Will need to be checked)
- Double Stator Gear, Stator Cup and Magneto
- Front PTO Housing & Oil Pump (Will need to be sent in to be reconditioned)
- Intake & Injectors (Will need to clean the intake)
What needs replacement was a rod, all the pistons, crankshaft, Both oil pumps, the supercharger, and all PTO gasket. Keep in mind This is easily a thousand dollars in parts! Lastly, the block has to be bored five thousands over.
I found a 155 block on eBay and replaced the pistons. This is how I learned about the differences in motors. I had at this time not found an engine builder. I buy most of my parts from Short Block Technologies (SBT), eBay, Amazon, and Partzilla. There are some cases where the used part is as much as the new part. I would line out what parts you need and order them. Be careful of where you order parts from. Lastly. do research on the vendor you are buying from. It will save you a headache, money, and time.
Rotax 1503 4 Tec Engine – Removal Process
Now there are some significant points to make about how to work on a Sea-Doo Ski. Major work, which is the case of Oscar. The motor should be removed from the Ski. Now, this is going to require removing some parts and tools to accomplish the. To remove the motor you will need to remove or disconnect:
- Drain the coolant and oil
- Remove the Inferior Engine Cover (Two Seaters Only)
- Disconnect Exhaust Water box
- Supercharger (If Applicable) – Special Tool
- Jet Pump
- Impeller Shaft – Special Tool
- Intake manifold
- Coolant hoses to the ride plate
- Motor Mount Bolts
Rotax 1503 4 Tec Engine – Required Tools
Most of the bolts are Torx, get a good set of Torx Sockets. At this point, you will need a special tool to remove one of the supercharger bolts because of the clearance. In addition, you will need an Impeller Shaft removal tool. There is a bellow you need to push back to remove a clip. You can not remove the Shaft from the boat without this easily. In one of my boats, someone tried to force this out and got it stuck under the carbon ring retainer. I had to cut this off to get the shaft out. The clip according to Jimmy is an SOB clip. It is a pain in the $ss to get on and off even with the tool.
Step One – Remove the Oil & Coolant
So first remove the seat. To start pump out the oil. As a result. I’m not going to start the engine because this is not a conventional oil change. I use an inexpensive oil extraction pump I bought on amazon. You insert it down the oil dipstick tube.
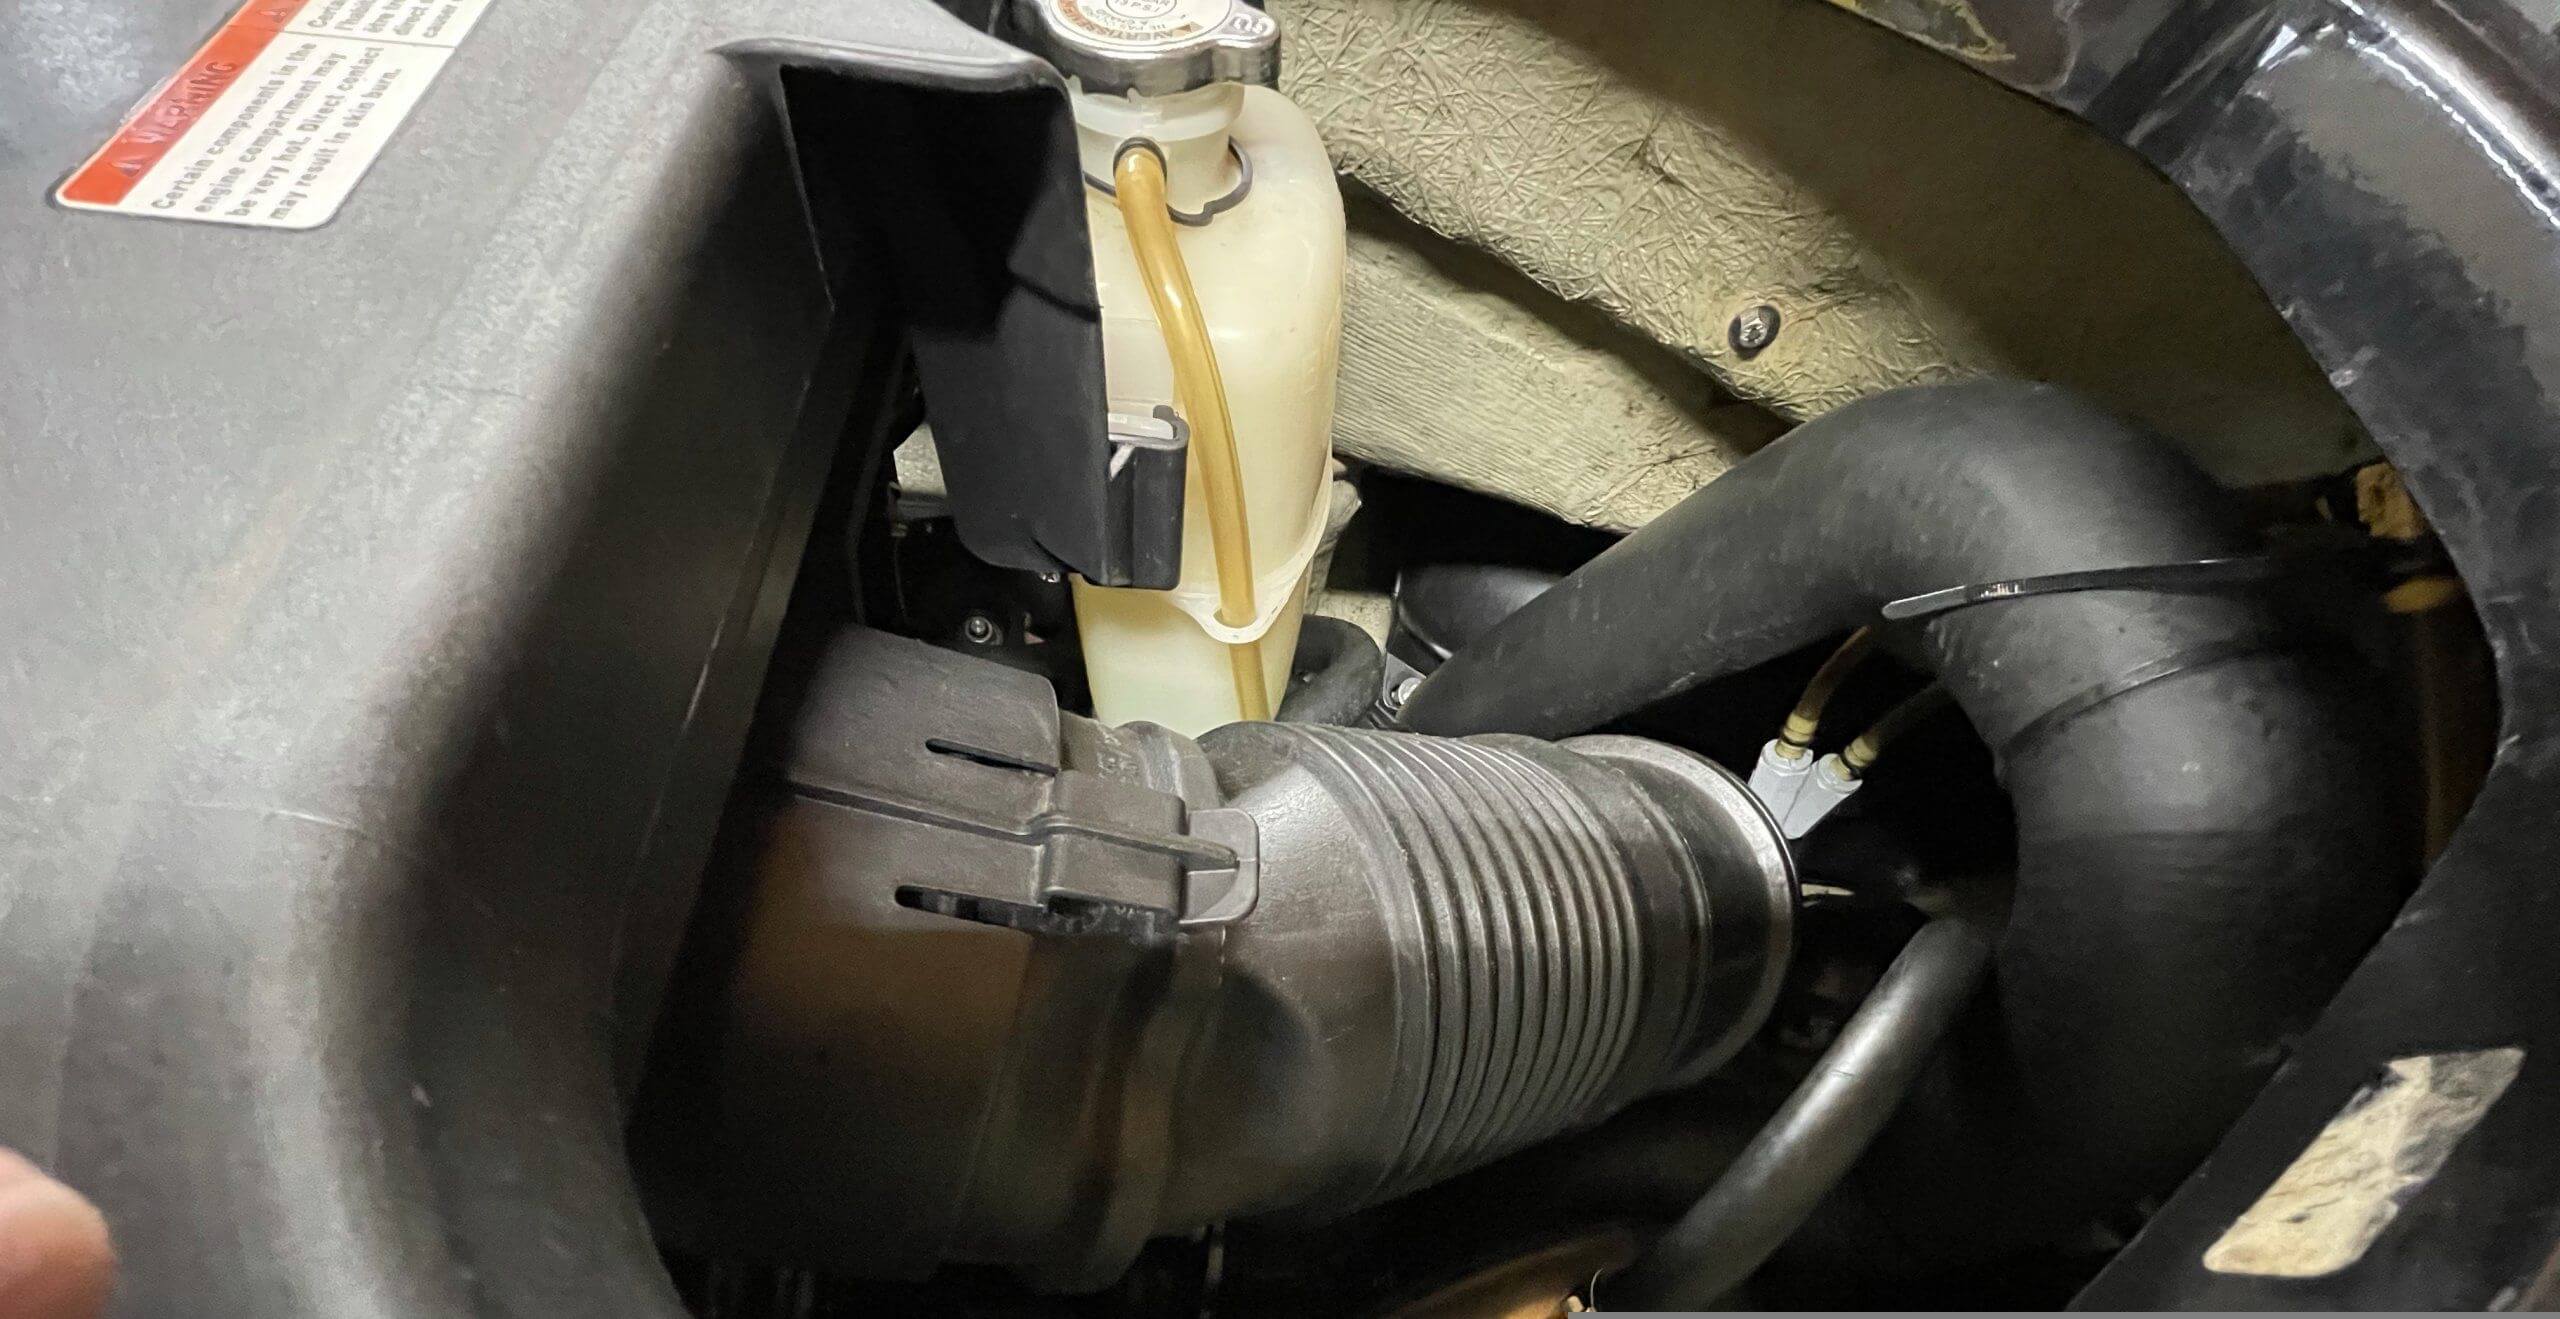
Oil Fill Cap / TOPS
Next, remove the Filter and remove the oil filter. This can be difficult. I use a small flat blade screwdriver to pry up on the edges. Next, Connect the oil pump to the battery. Do not run this pump dry! Turn the pump on if there is a switch and drain the oil. You will likey get about three and a half quarts out. Now move on to draining the coolant. Secondly, remove the cap on the coolant recovery tank. Remove the 5mm Allen head bolt on the bottom of the ride plate into a five-gallon bucket. Lastly, Disconnect and remove the battery!
Step Two – Remove the Seat Mount
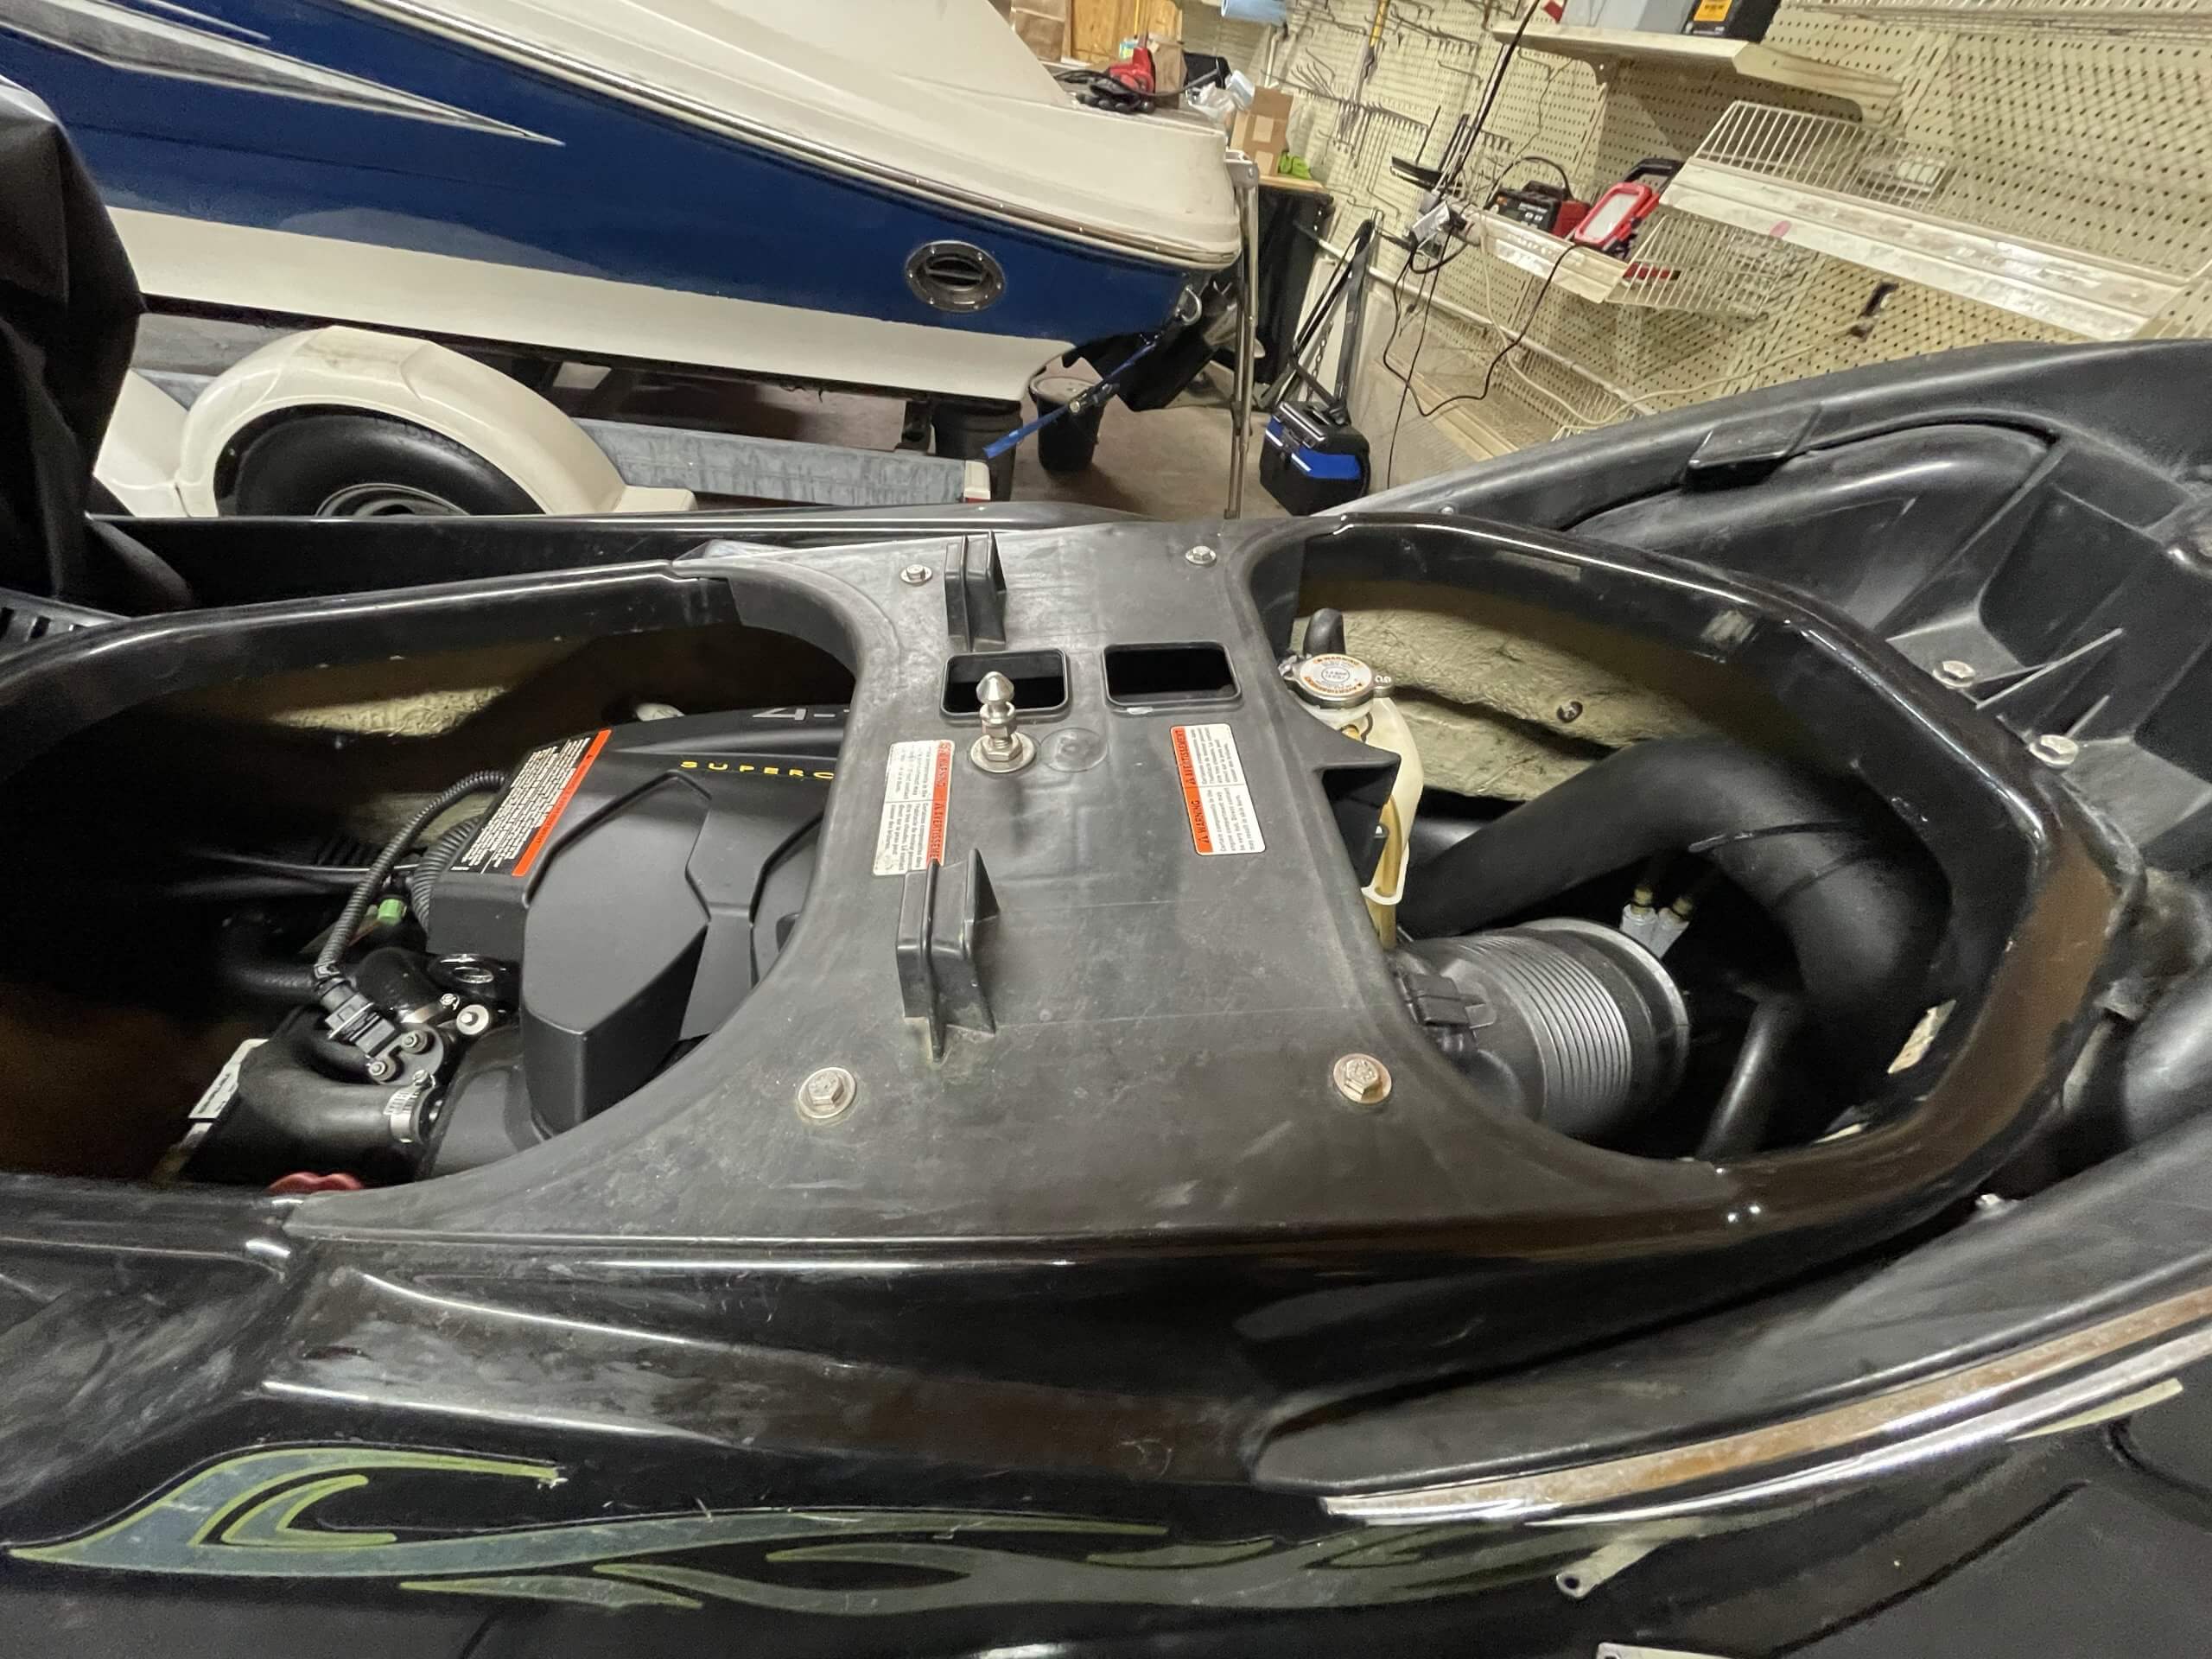
To start by removing the air tube (Left Picture), seat and remove the mount (Right Picture). It’s these four 10mm bolts.
Step Three Remove the Water box
So to remove the water box, remove or loosen the clamp from the exhaust to the water box. Now to start there is an 8mm nut, and you will need a deep socket. to back the nut off so you can loosen the clamp. Next, disconnect the hoses that connect the water box to the exhaust manifold. Removing these are going to be tricky because there is one on the underside of the manifold. There is also one on the top of the exhaust manifold. These are like a 4.5 or 5mm band screw if they have ever been removed. Otherwise cut/remove the Otiker Clamps. Next, remove the rubber clamp that holds the water box to the hull. It’s easier to get off than on, and it’s a tight location. Once you do that you can either push it out of the way or remove it.
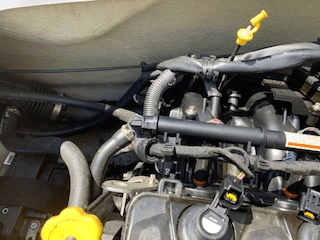
Step Four Remove the Supercharger (If Applicable)
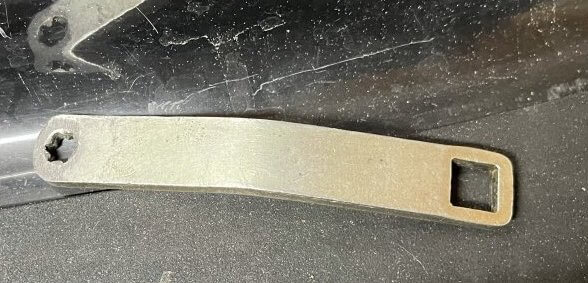
First, If this is the supercharged version of the ski, you need to remove the supercharger. At this point, you should have the water box out of the way or removed. You will need it moved or removed to access the top screw. Firstly, start by removing the Supercharger inlet and outlet hoses. Set these aside. Now remove the top Torx bolt. It’s the one that screws into the back of the supercharger. You will need a special tool to remove this bolt. There is a picture above of the tool I use. Additionally, It going to be a little difficult to remove due to space constraints. Lastly, after you remove this top bolt, you will need to remove the bottom two bolts. Keep in mind one is tucked up under the supercharger and the other on to the right. They are difficult to see.
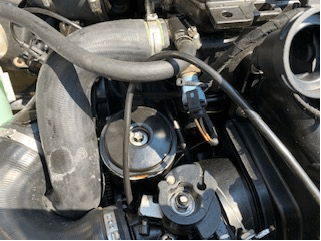
All the bolts are in 1a. There are a total of three of these bolts. I’ve highlighted two of them. To get the supercharger off turn left and right while pulling it towards the back of the ski. I also have used a pry bar that I place between the PTO housing and supercharger.

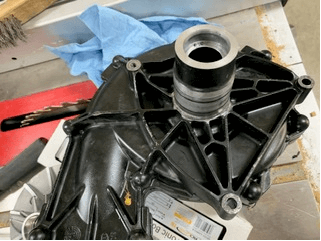
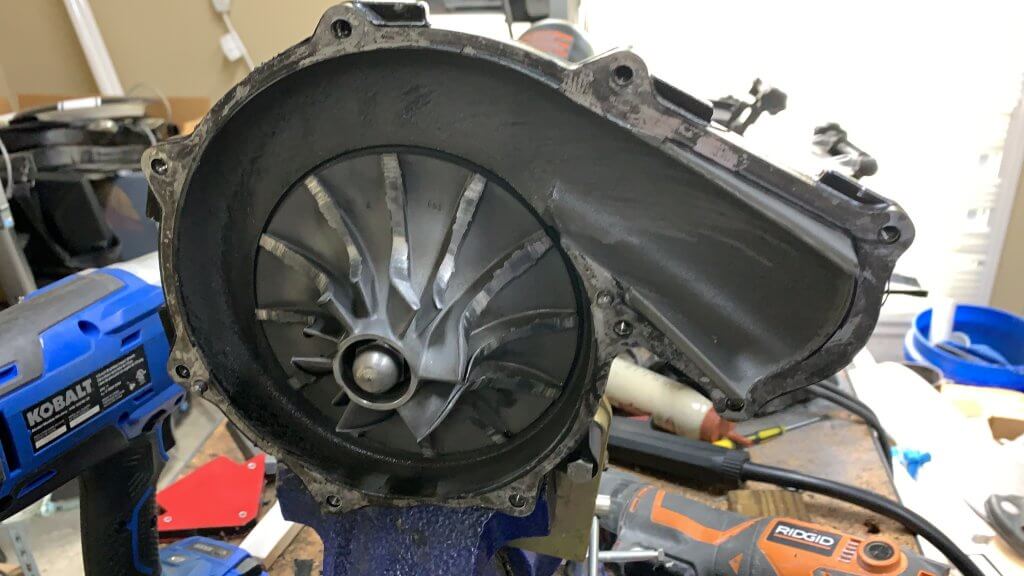
Step Five – Inspect the supercharger for signs of wear
Firstly look at the supercharger itself. It should have no oil or silver coating. Also, check the inlet and outlet hoses, they should have no oil or coatings from the supercharger turbine. Secondly, look at the supercharger turbine fins. None of them should be bent. Check for any wobble of the front shaft. If any of these conditions are present it needs to be rebuilt. Also, if the slip washer is anything but the steel ones they should be replaced.
Step Six – Check the supercharger for proper slip
Additionally, you should check the supercharger slip. Firstly, keep in mind, It should be within the tolerance in the manual. It should be between 6.5 and 8 foot-pounds. Please, double-check the manual. You can do it on the engine or on the bench. If on the engine, you must prevent the motor from rotating. The motor will sp
Please tell me that youre heading to keep this up! Its so superior and so important. I cant wait to read additional from you. I just feel like you know so substantially and know how to make people listen to what you have to say. This blog is just too cool to become missed. Terrific stuff, really. Please, PLEASE keep it up!
Yes I am, and I will keep it going. I have had a few delays but the latest is the engine starts and runs.Thanks!
This blog seems to get a good ammount of visitors. How do you get traffic to it? It offers a nice individual twist on things. I guess having something authentic or substantial to post about is the most important factor.
So is it okay to use shell Rotella t6 full synthetic or not ? Sorry just trying to figure out for sure as I just changed the oil in my 2008 rxt 215 with shell Rotella t6 full synthetic
It’s what I use , the Shell Rotella T6
I have a rotax 1503 seadoo engine I want to install into a car. It has 215 HP but I’m looking at ways to raise the hp. I am having issues with finding a way to attach it to a primary clutch from a snowmobile to use as the transmission to the driveshaft. I would appreciate any suggestions on how to adapt the engine to work in a car
Im doing exactly the same green seadoo ski at the moment and whative just read is what ive also found . My problem was the cog off the supercharger shattered and went everywere. Getting ready to order parts now to put bavk together
Enjoy , it will definitely be a learning experience. Tends to destroy the bottom end when the supercharger comes apart. Crank, connecting rod(s) , pistons, oil pumps , and cylinder walls will have to be inspected. Do not use synthetic oil like mobile one , unless it’s designed for wet clutch. I think it’s a M rating. Stay on top of all the supercharger maintenance intervals.
Thank you for taking the time to detail the 1503 rebuild process! It saved me money and was an enjoyable rebuild.
You’re welcome, glad it helped. I’ve been lax on blogging. We now have a big project house, so the boats are in a holding pattern till we get through that.