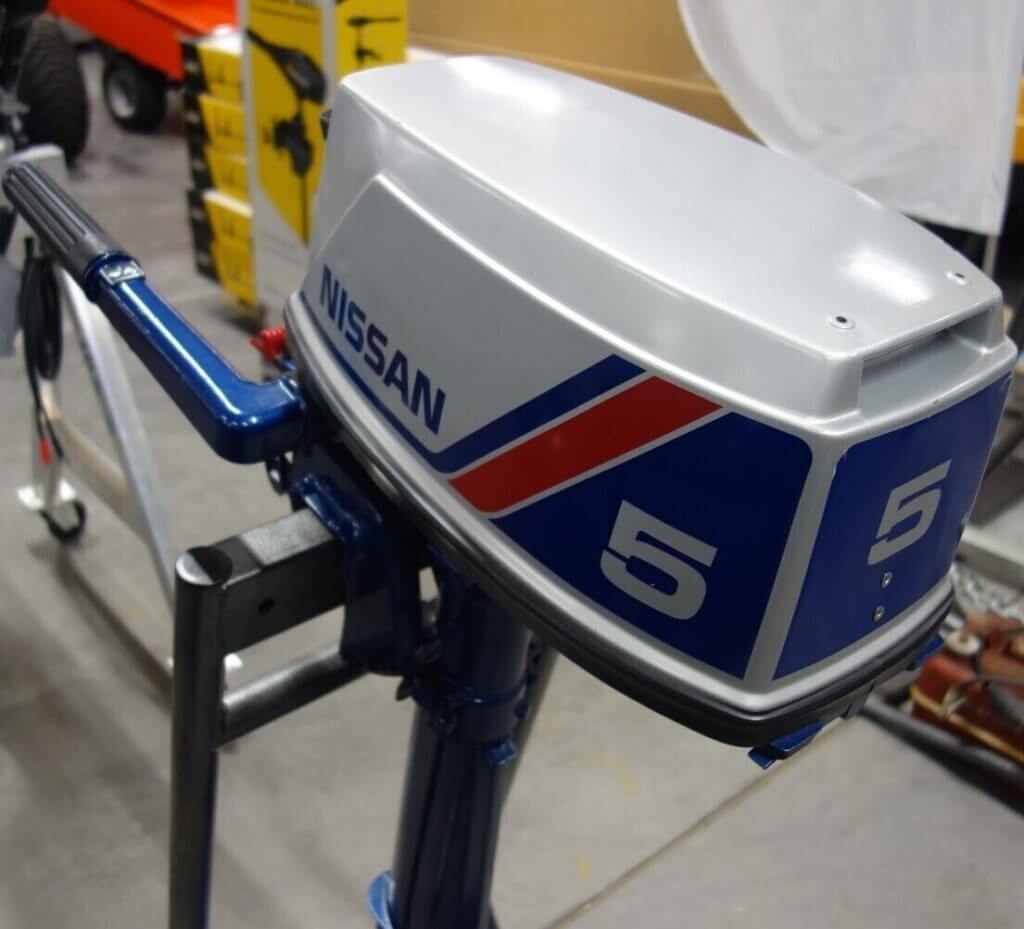
So on the fourth of July, we went to take Pippi & Rocket to the shore. This was our first attempt to start the Nissan NS5B Outboard we got with “The Nauti Oar”, the Zodiac Tender, or “Eustace”. It would not go into neutral to start. We bypassed the lockout mechanism, not too smart but we wanted to see if she would start. The Outboard would start but then would stall out. Additionally, we drained the old gas and replaced it with fresher two-stroke mix. It still would not stay running. So we gave up and determined that I would have to go through the outboard later at the shop. In the meantime we had to row to shore and have our friends take us.
Now, I would like to point out there are two technologies I dislike here, a carburetor and a two-stroke motor. Lastly, what I need to keep in mind is that this probably makes this outboard really light, and that is what I want! What I don’t want is my back to go out lifting this outboard or something heavier.
The Diagnosis and Dissambly – Nissan NS5B Outboard
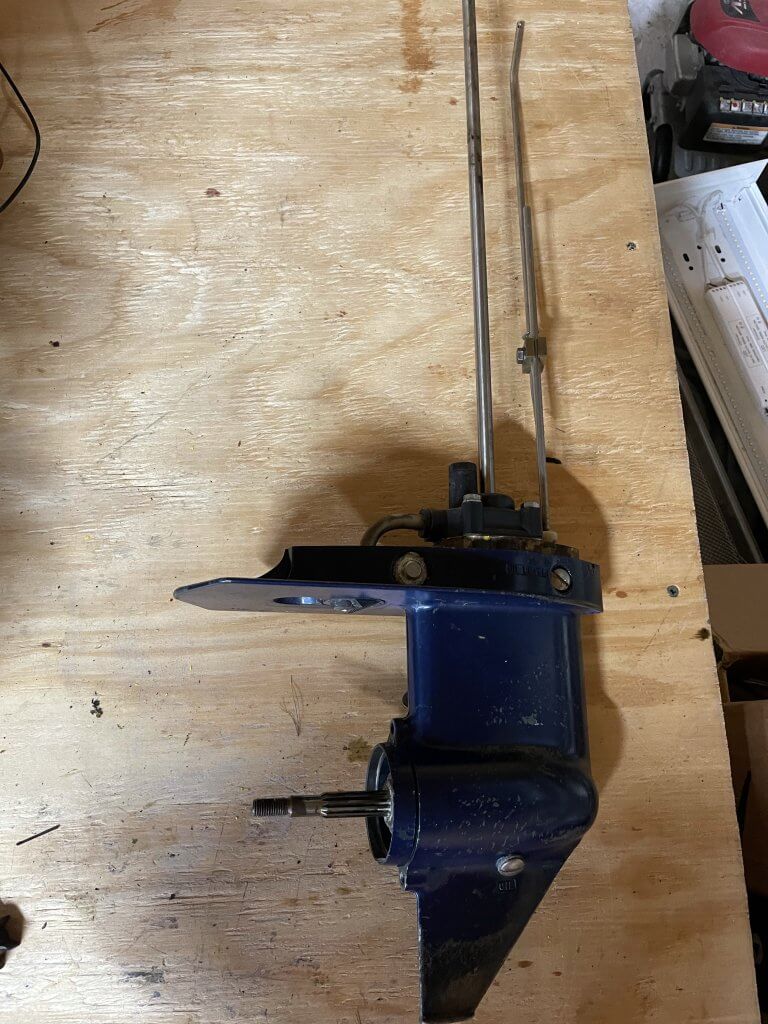
Nissan NS5B Outboard 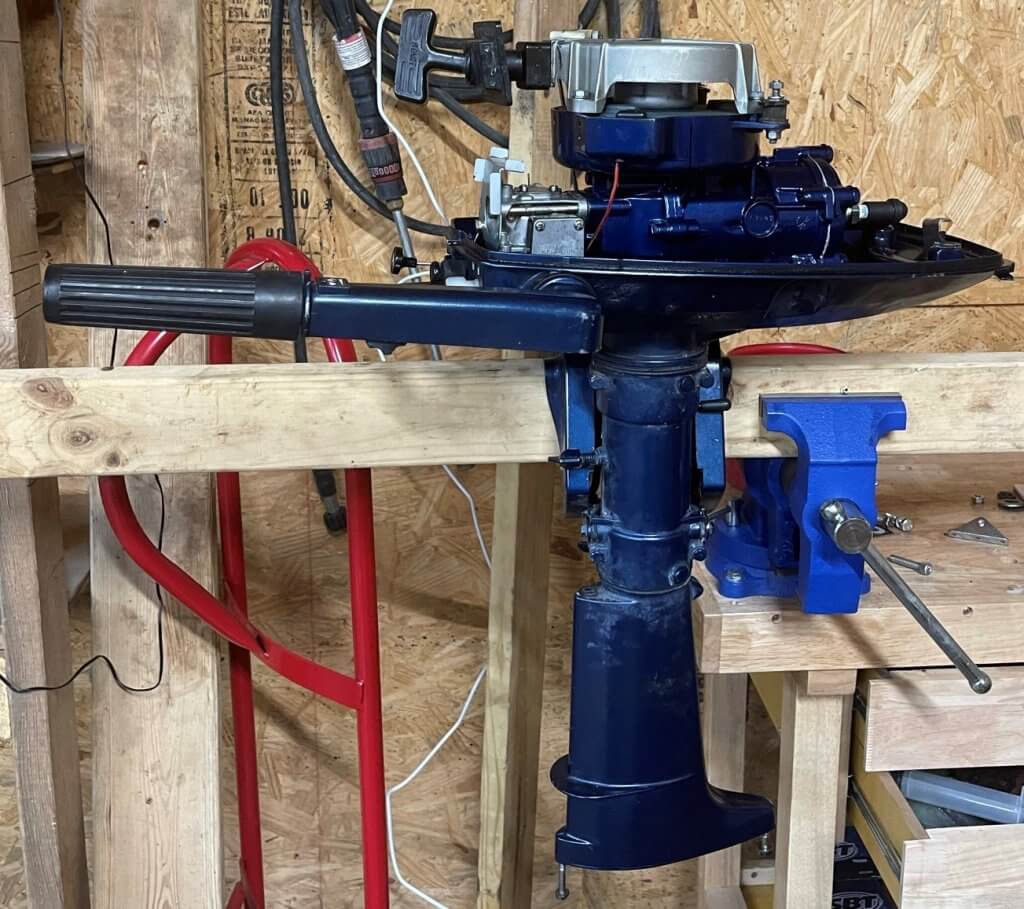
Gear Cass Removed 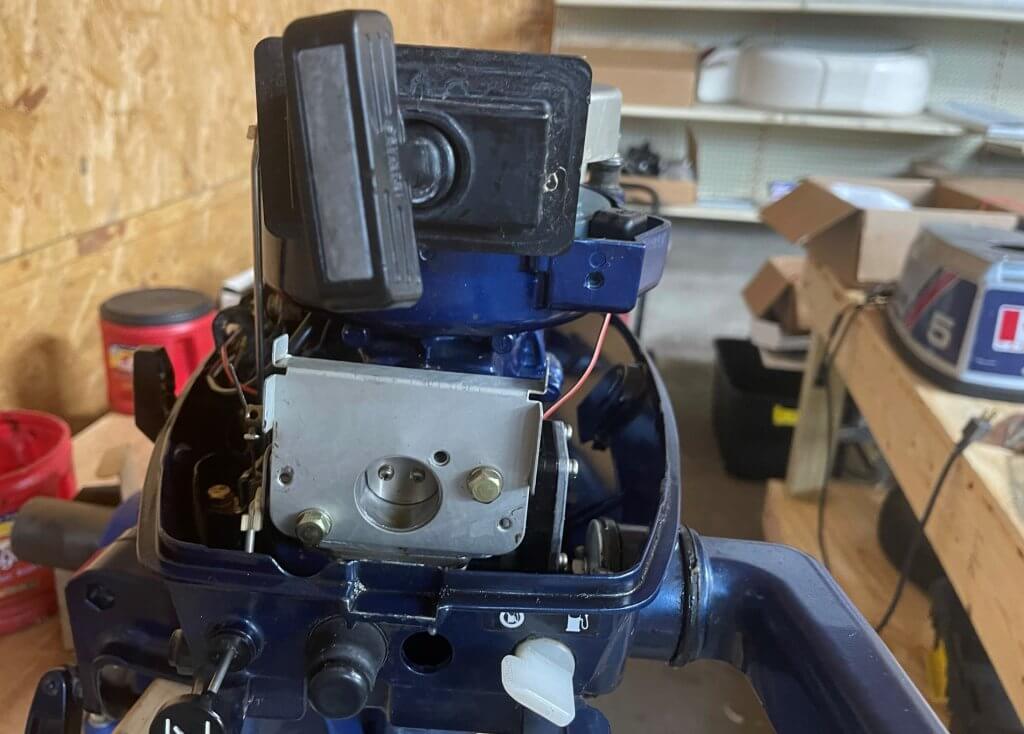
Nissan NS5B Outboard Back View
To start the diagnosis, I pull the cover off the Nissan NS5B Outboard and attempt to determine how the neutral safety switch works. It looks like it’s a rod that moves an actuator up and down in the lower unit. So I attempt to drain the oil in the gearcase housing. To add to the current situation there is nothing but black water that drains out! so next, I remove the gear case because looks like there is something wrong with the actuating mechanism.
It appears that the shifting mechanism is completely seized up. The lack of oil in the unit could be part of the problem? Wait it gets even more interesting.
The issue is the gear case (Crack) – The Diagnosis and Dissambly of Nissan NS5B Outboard

Gear Case 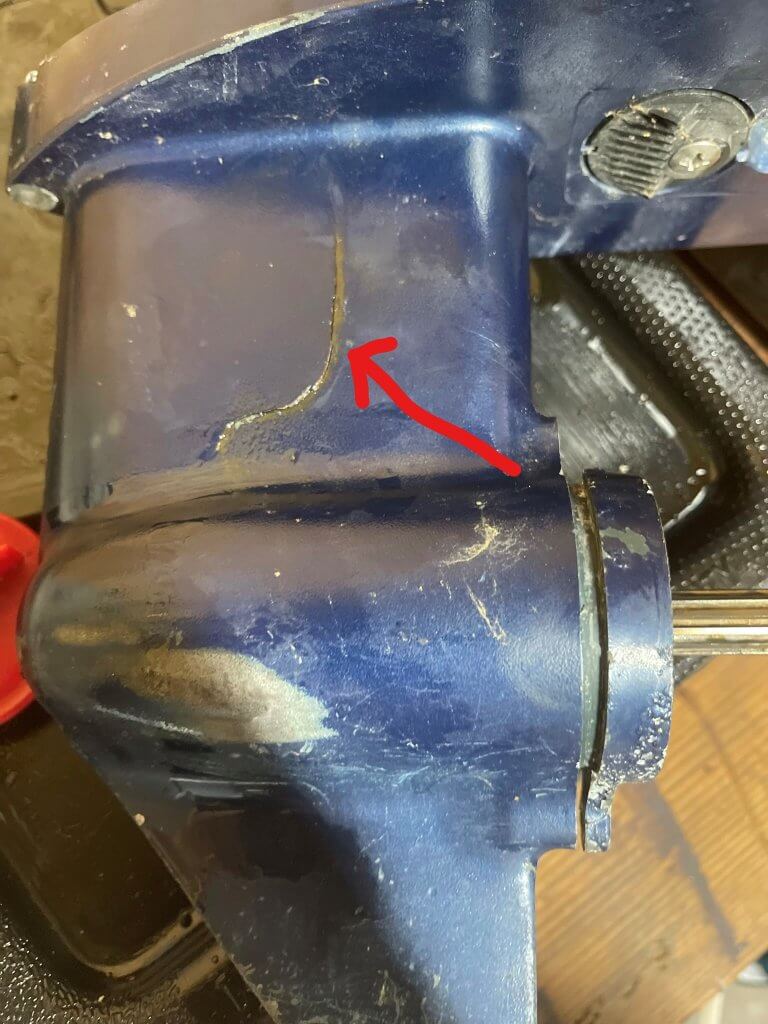
Gear Case Crack 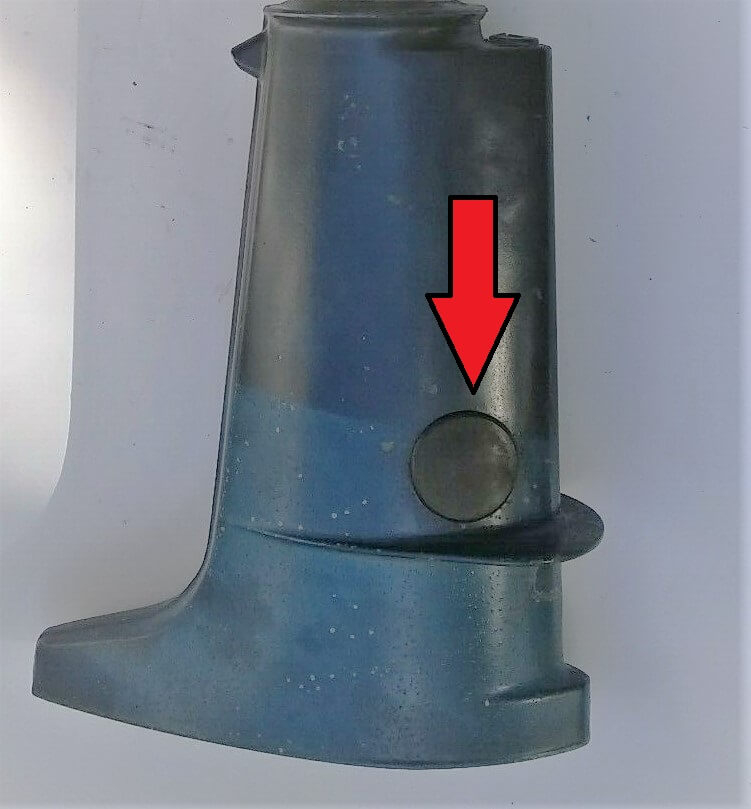
Nissan Tohatsu 5hp Midsection
So you can see from the pictures there is a massive crack in the gearcase housing. Additionally, the outdrive PTO retaining ring is broken. So this lower unit is probably junk. The crack was likely from something coming apart in the lower unit. Now what I have to determine here is whether I want to repair this or buy a new one? After a bit of searching, I determined a new five-horsepower four-stroke of similar quality is quite pricey. A used lower unit is like two hundred dollars shipped, and I get to save something and not throw it away. Also, those four-stroke motors weigh a bit more in comparison. Thirty pounds versus fifty. Additionally, I’m not a big person so this it about a third my weight. So repair it is for now! Worse come to worse I can sell it an buy a new one.
The gear case replacement (Removal)
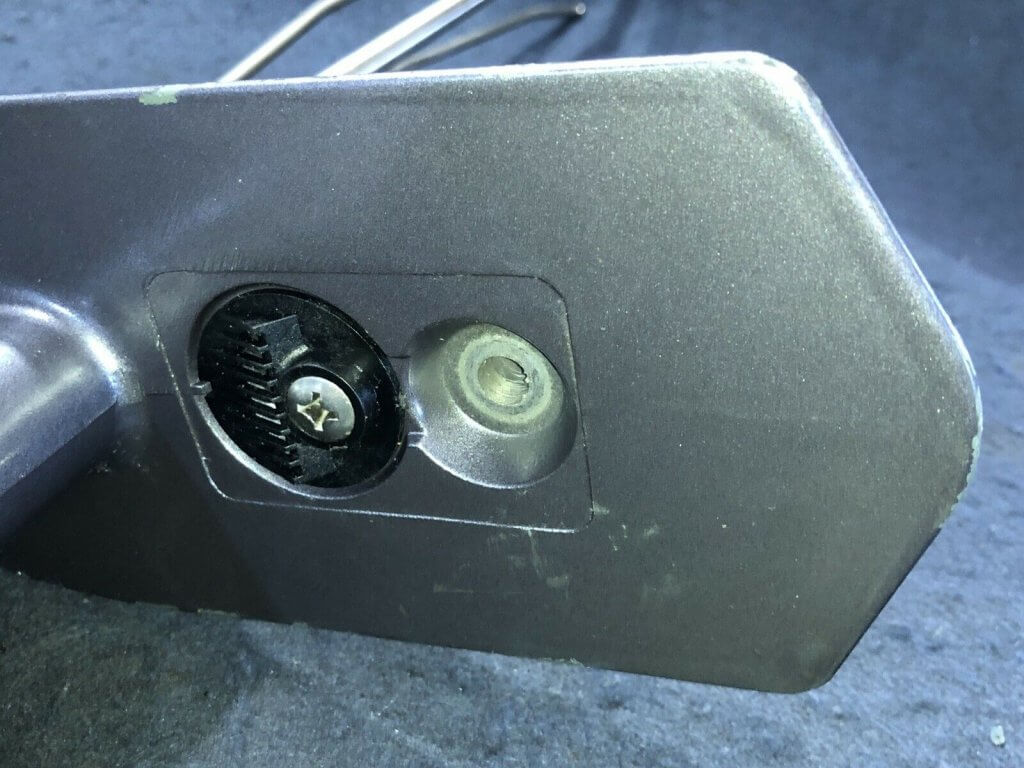
First, to start I would strongly suggest that you find the manual for the outboard you are working on. In our case, this is a Nissan NS5B, and it is actually manufactured by Tohatsu. The removal of the gear case is pretty simple. Additionally, you need to drain the oil in the gear case. I already had done this. Next, remove the rubber plug on the midsection to reveal the access nut and clamping mechanism that connects the gearcase shift lever to the actuator in the gear case. You then remove the two bolts (8 and 10mm) that attach the gearcase to the lower unit and pull straight down. Again, I would follow the directions outlined in the manual. Below is the link to the manual for this outboard motor.
Nissan Tohatsu 5hp Midsection 
Nissan NS5B Outboard-2
I did this before I ordered the part to ensure what I was dealing with from a parts perspective. I’ve ordered a part only to find out I overlooked something critical and wasted time and money. I seem to do this a lot!
The replacment gear case ordered
I ordered the replacement gearcase off of eBay and waited for it to arrive. The replacement gearcase was in fairly good condition. There were just a few scuffs. It said it had low hours, but I have no clue how this is determined when there isn’t an hour meter. The only difference is the overall color (Grey vs Blue). The impeller and related parts look to be in great condition. The old gearcase is corroded and in bad condition due to lack of maintenance and being in saltwater. The newly used one is from freshwater and has no signs of corrosion. You can see from the pictures below
Bottom View Nissan Tohatsu 5hp Gear Case 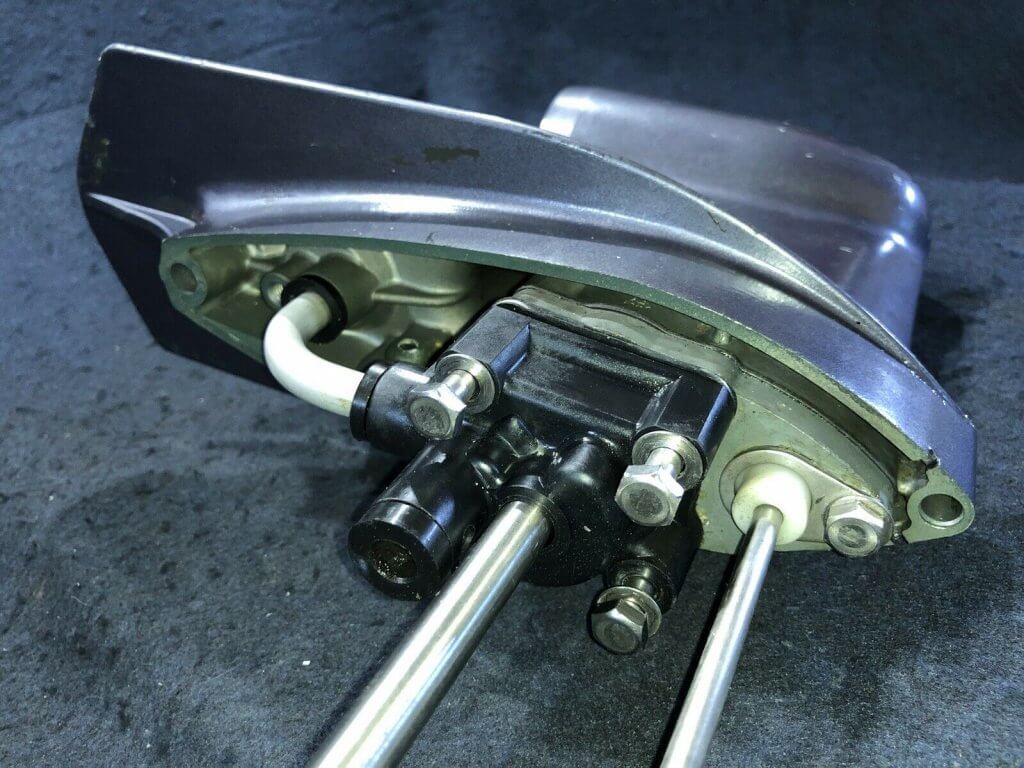
Impeller Housing Top View Nissan Tohatsu 5hp Gear Case 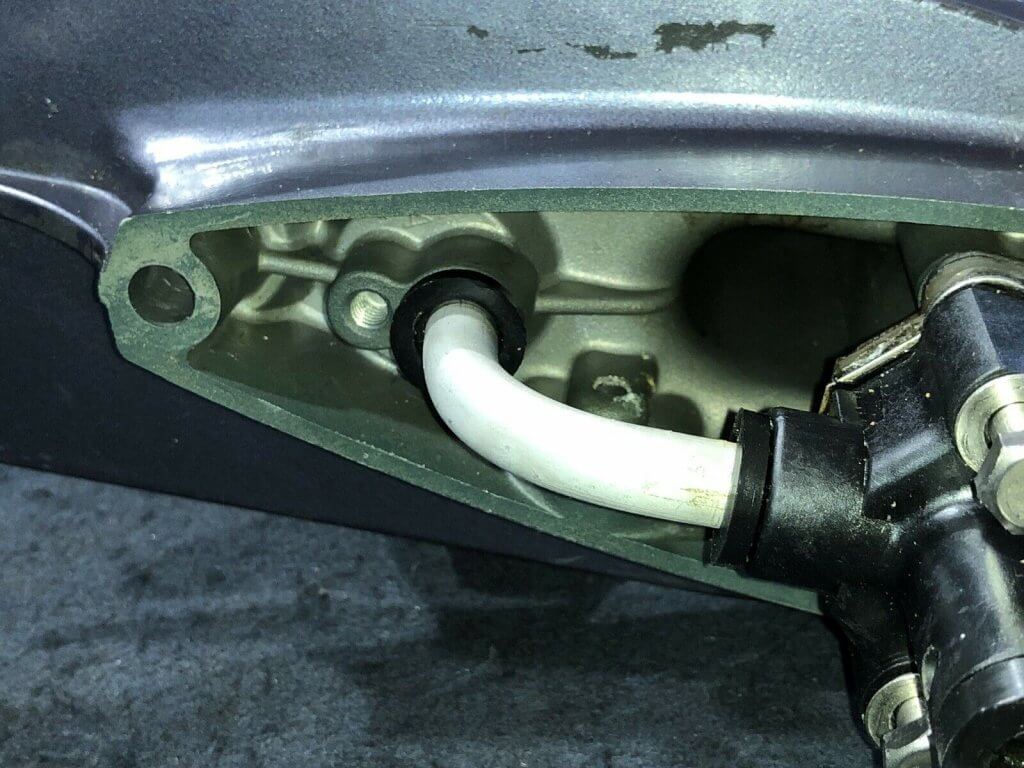
Nissan Tohatsu 5hp Gear Case Impeller Housing View 3 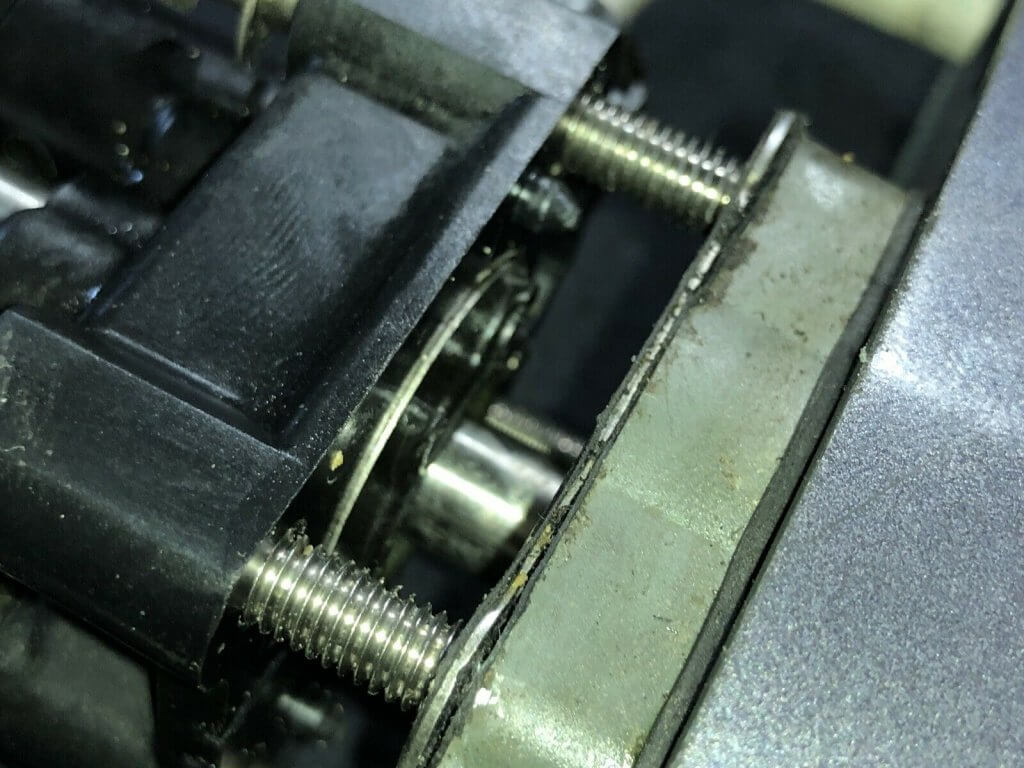
Nissan Tohatsu 5hp Gear Case Impeller Housing View 2 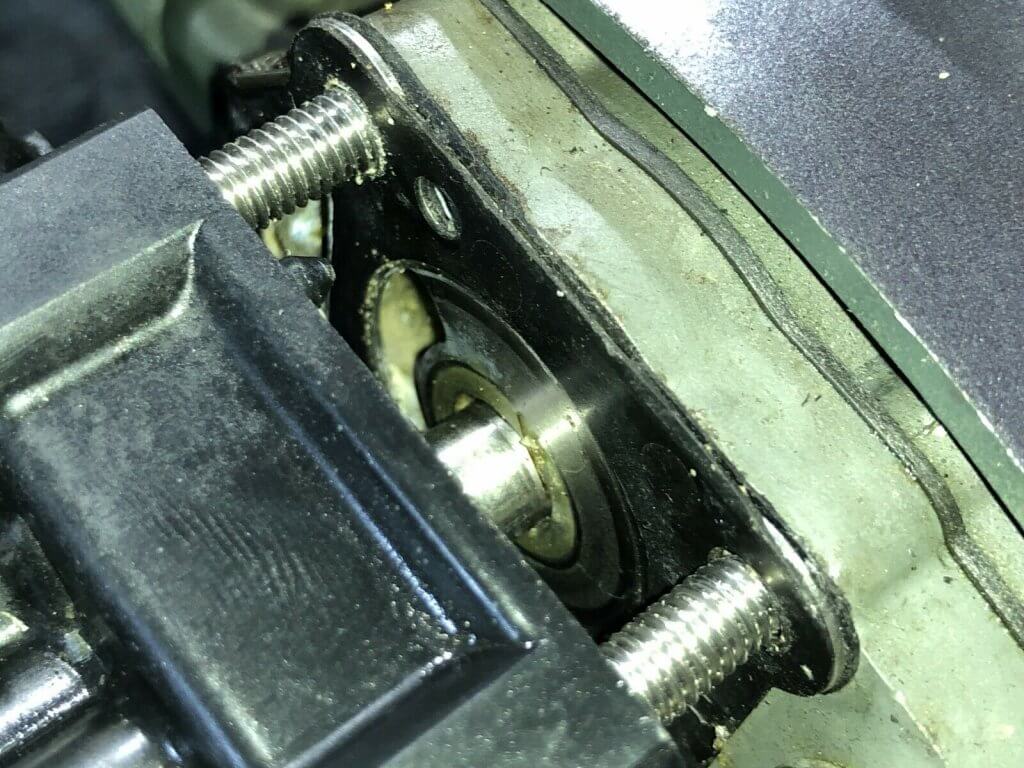
Close Up Impeller Nissan Tohatsu 5hp Gear Case 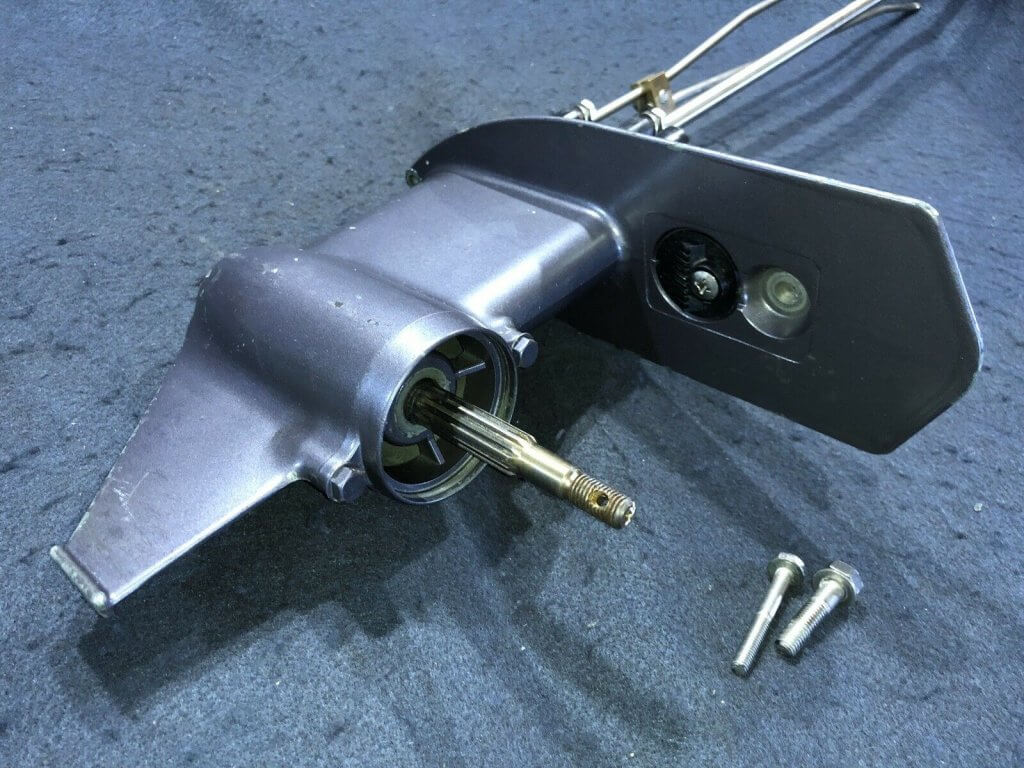
Nissan Tohatsu 5hp Gear Case 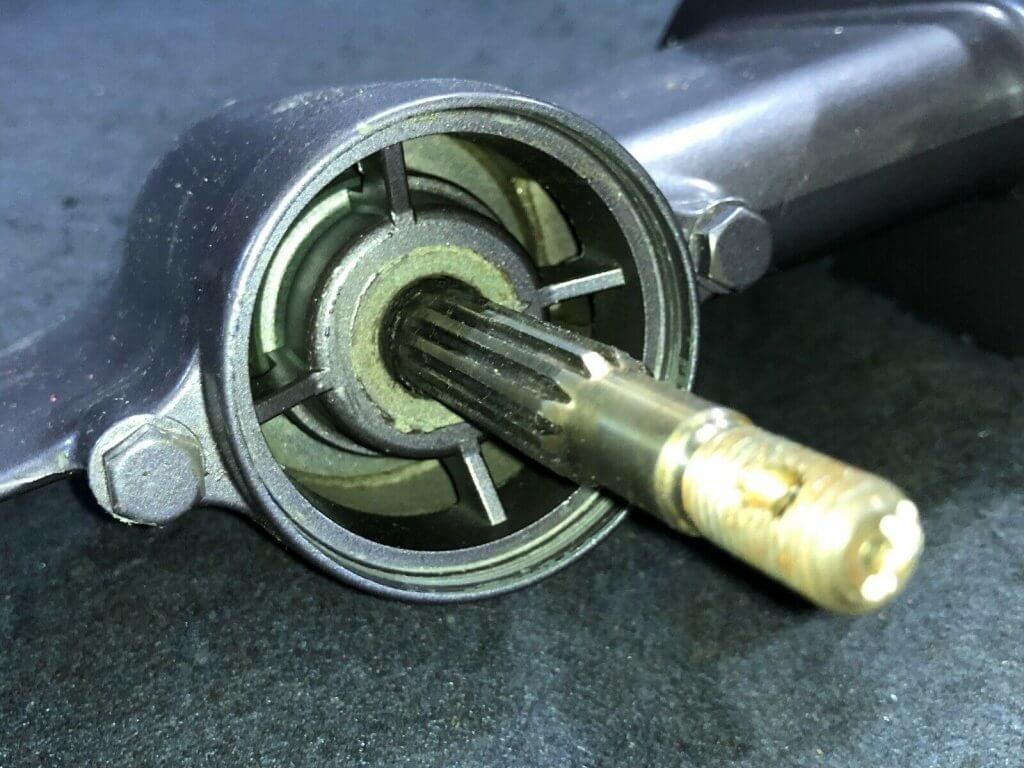
Prop Shaft Nissan Tohatsu 5hp
The gearcase replacement (Installation)
The installation of the gearcase is fairly simple. What I will say is the most difficult part was getting the shifting mechanism reattached and working correctly. There is a picture of the nut below. First, I will say having the motor on the makeshift stand I have was a detriment. You are fighting gravity and a whole host of issues that are better addressed with the motor laying on the bench. Which after struggling for ten minutes or more I abdicated to doing this the hard way. Additionally, when you attach the shifting mechanism. Don’t overtighten the bolt, just snug so it operates the shift mechanism. You will need to adjust this later after you get the motor upright and operate the shift lever mechanism to see if it goes in reverse, neutral, and forward.
So to adjust the sifting mechanism. I would start in neutral. Do not start the motor while doing this, in fact, remove the safety lanyard and disconnect the sparkplug. If the shifting mechanism is neutral the prop should spin freely by hand. If not then adjust the shift mechanism to accomplish this. Tighten the bolt. Next, Proceed to put the shifting mechanism into reverse. It should drop into gear and there should be resistance on the prop when trying to rotate the prop by hand. Move the shift mechanism back to neutral the prop once again should spin free without resistance. Next, go through the same process for forward. Lastly, when you are done tighten the bolt. Now fill up the Gearcase with 80W or 90W oil. So, on to testing that the Gearcase is correctly working.
The Gearcase Engagement (Testing for correct engagement)
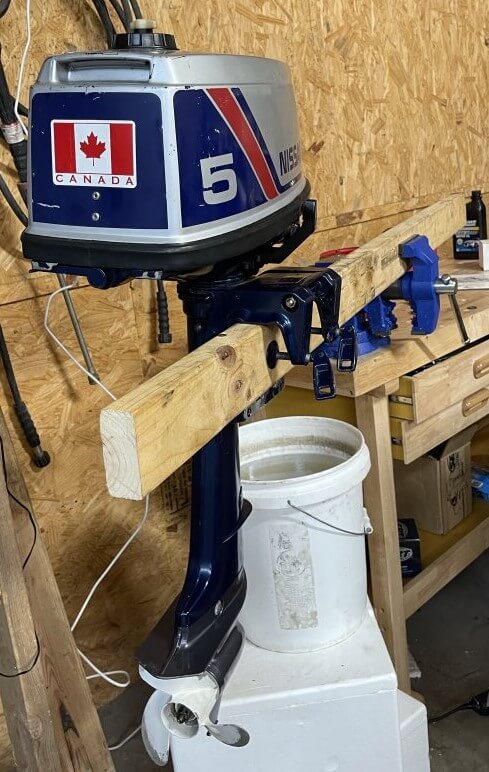
First, we start by filling up a five gallon bucket with water and lower the Outboard into the bucket of water. So, What we are trying to accomplish here is to make sure the engine starts and that the motor, gearcase and impeller/water pump are operating correctly. Secondly, there may need to be some minor adjustments to the shifting mechanism. You can see in the picture above the set up I have for testing. It’s not pretty, but it will suffice what we are doing. Word of caution here I would make sure you have a well ventilated area. I have no idea the mixture ratio that I have. I much suspect it’s less than 40 to 1. Who knows though. The engine starts on the first pull so that is a positive sign.
So the real test will be in the spring when I put “Eustace” back on the Trick Davit and take “Nauti” out. We have a few more winter projects, though its not winter yet. My wife dislikes the space that “Eustace” takes up on the swim deck. It also makes maneuvering into the slip a bit more tricky. Might need to look at a high low swim deck. Might not be worth the investment though ?
Nice write up and great job.
Great! I own 1 ” Eustace” 1993 , almost like new condition. Also own 2 other 1993 Tohatsus, Grey Nissan and 1 dark metallic green Tohatsu ,all 3 same identical longshaft outboards. Also own a 2003 Mercury- Tohatsu that is improved 1993 model.read from possibly smart people that:Nissan changed color of same outboard in 1993 from blue scheme to grey,Also carb improved shortly after 1993, some smart ones say many Japanese changed cabureters from reeds in carb and shims,to another system. Problems of 1993 and similar are hooks that hold the outboard to its own transom clamp assembly ,(designed to dissattach when running over object or sandbar in forward gear) this pair of hooks loosens over time.My outboard’s worn hooks caused the outboard to fly completely up in the air and lock in place sideways out of the water while I was in reverse trying not to overshoot my new dock at a new marina! The round rubber tubular seal that surrounds the propeller shaft rod,(where the cotter pin goes in() was completely worn and caused propeller not to spin.If you tie the hooks mechanism to the outboard body with wire ,a rod that slides up from the lower leg will be blocked by the “wired hooks” frame which causes the attempt to put the motor in forward gear to be blocked!
Number one weakness is flimsy weak easy to tear black rubber cowling gasket,it tears easily on anything hangs up on shift lever when pushing cowling down and will come off if motor is transported and whole cowling is loosened by its lock down lever in the back being slightly loose.weak cheap super easy to tear gasket,stapled on at factory.9.9 models have thick substantial gaskets! Don’t forget never by boat engines or outboards from saltwater use area,always go inland,High price Volvo marine engine repair owner taught me this!