This is the process of completing a RayMarine Axiom Camera Setup. So we are going to extend the RayMarine Axiom 9 RV to add Camera capabilities on “The Nauti Oar“. Firstly, the reasoning behind this is two fold. First, the prior owner spent some dollars putting in an Axiom 9 RV, a Raymarine RD418HD 4kW Digital Radome , a SeaTalk STNG Converter, a NMEA 2000 to 183 Gateway and a RayMarine HS5 SeaTalk Network Switch. Additionally, what I’m going to do here is add a bit more functionality already available in the Axiom 9 RV. This will help extend some of the capabilities of the boat around Navigation and Insight. Below is a list of things we are going to do in this round of upgrades.
- Rear view Docking Camera
- Gigabit router for networking capabilities
- Wi-Fi Router for wireless access (Wi-Fi as WAN)
Firstly ,what this will allow me to do is to complete the foundational activities for me to IoT enable the boat. Allowing me to get near real time sensor data. Further more it will prepare “Nauti” of the next set of activities that will allow me to extend the functionality of the existing RayMarine Axiom 9 RV. The Sea Ray 210 Select is generationally ahead of this boat. There are things I wish I could see from the engines and instrumentation telemetry wise that I can’t get with the analog gauges. Additionally, I can start with what is already there and expand upon the existing building blocks to get the functionality. This is part one of the process of doing a RayMarine Axiom Camera Setup.
RayMarine Axiom 9 RV
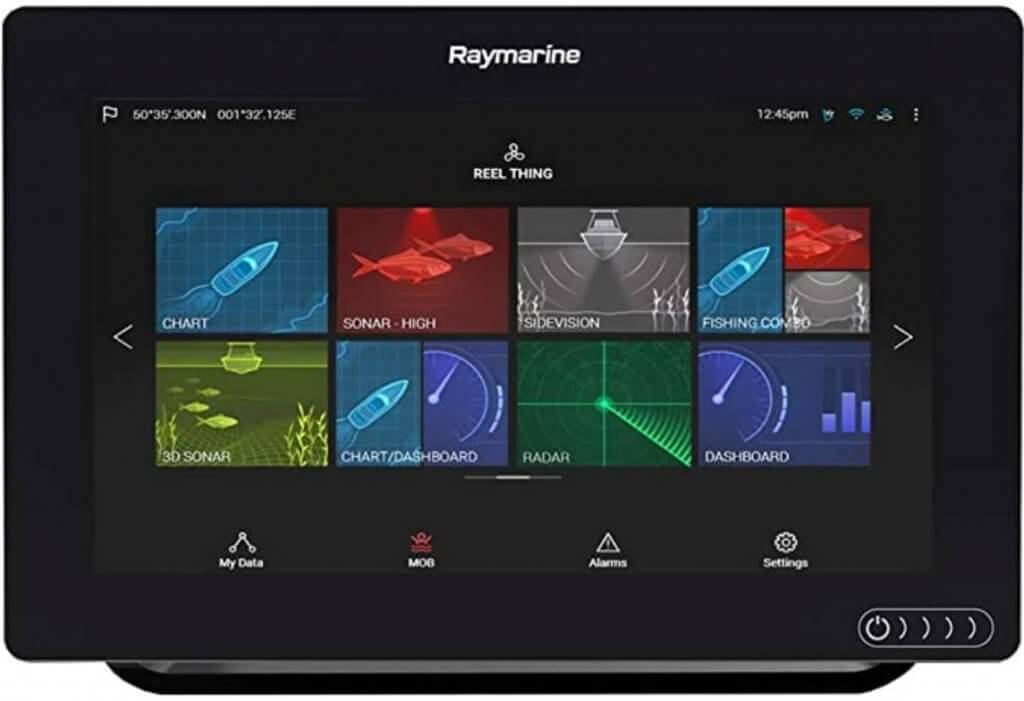
So there are a lot of different RayMarine Axiom 9 devices. Apparently the RV identifies it as Real Vision 3D device. Now “The Nauti Oar” does not have the hull sonar transducer(s). This is not in the kit and needs these pieces to get the Real Vision 3D Sonar to work. There are a few transducer options here like the RV200, and RV300 that may work. We are going to address that later and not in this iteration. Additionally, What were are trying to get to work is the integration of the 3rd party camera into the Axiom 9 RV, Some Wi-Fi for the smart TV’s and Gigabit Ethernet for later use.
RayMarine Axiom Camera Setup – Rear Camera
So, this all started with me looking into how to get a rear camera on the boat so I can dock her a bit more easily. With the current setup I can not see through to the Starboard or Port sections of the swim platform. I’m hoping a rear camera will accomplish this? I could look at a RayMarine IP 220, but that is a five hundred dollar camera and this one I bought is like sixty dollars. Lastly, if I go to RayMarine’s Augmented VR platform this camera will not work but the foundation will be there. As with everything I tend to do it got “Ravisized”. The RayMarine Axiom 9 RV does not allow for analog camera inputs. It will have to be a modern camera that supports ONVIF protocol.
RayMarine Axiom Rear Camera Setup – Required Items
So I will use the following products to extend the functionality and complete the RayMarine Axiom Camera Setup. There is some discussion that this might not work.
- Cradlepoint MB95
- Netgear GS308
- Amcrest 5MP UltraHD (ONVIF) – (This Might Not work with the Axiom 9 RV)
- POE Injectors
- 12Volt Pigtails
- Raynet (F) to RJ45 (F) Adapter
So ,the approach here basically is to connect the Amcrest to the Netgear GS308 with the POE adapter(s). Next the Netgear GS308 to the RayMarine HS5 SeaTalk Network Switch on Port Six in the helm. There is an adapter we need to accomplish this is the Raynet (F) to RJ45 (F) Adapter. We are going to put the Cradlepoint and Netgear Switch in the Salon somewhere eventually. We are going to keep the NetGear and Cradlepoint out of the elements. All of the Wi-Fi and Switching devices are going to run off the twelve volt subsystem. This is so they can operate while not on AC power. Understand I will need to have some consumables like Cat 5E bulk cable and ends to connect these devices. I’m going to backhaul via ethernet into the Salon. I will Mock everything up on the boat before installing things permanently.
RayMarine HS5 SeaTalk Network Switch – Reconfiguration
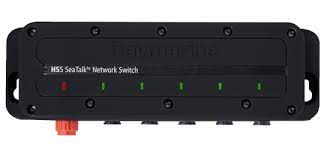
So above is the RayMarine HS5 SeaTalk Network Switch that is in the console of the helm. It looks like like this. These are around two hundred fifty dollars. A regular gigabit switch is like thirty dollars! The fifth Port is a Gigabit Port, every other port is 10/100. From what I have connection wise it looks like I have two free ports. Furthermore, I’ve got the ports mapped out here below.
- Power – Red Led
- SiriusXM weather radio – Port One
- Free – Port Two (Axiom 9 RV Here)
- Free – Port Three
- Radom – Port Four
- Axiom 9 RV – Port Five (Free up for 100/1000 Uplink Netgear)
RayMarine Axiom Rear Camera Setup – Process
Firstly, I’m going to have to move the Axiom 9 RV connection to port two. Additionally, I don’t want to cause an issue with what is currently working. So I will test everything on the Axiom after I move the connection, Furthermore, I’m waiting for some supplies this weekend before I start on the camera installation. What I have so far is all the hardware. as listed above. I will mock everything up before I make this permanent. Lastly, I’m going to have to figure out how to run cables in this boat.
Network & Wi-Fi
So the wiring is a bit of a mess in the helm. I pull the back off of the helm console. The sea talk highspeed switch is in the bottom just laying there. I power off the switch and move the the connections around to get port six free. Next, I then install the ethernet converter into port six. Now the Axiom MFD has it’s own Wi-Fi and network. I may have to make some configuration changes to make this all work.
Cradlepoint MB95 Router
Firstly, keep in mind the Axiom 9 RV is pretty advanced. So it already has Wi-Fi and some sort of network configuration. I can see this when I connect to the Wi-Fi. The network is 192.161.1.0/24, I may have to do some configuration to get this to work since the Cradle Point has its own DHCP server and IP. It may take me putting my laptop on the RayNet network and see what I can see.
At this point you may be asking yourself why am I installing a Cradlepoint Router? The answer is straight foreword, it allows Wi-Fi as a WAN with multiple Wi-Fi connection profiles. This is something that works right out of the box, no custom configuration and firmware like Asus-WRT or DDWRT. I have about twenty routers in the field that have custom firmware. These are hard to support from a technician perspective. I don’t want to introduce anymore complexity on this boat!
Power and POE Connections
To connect all the devices we need twelves volt power we need to create some connectors that will allow us to power the Netgear GS308 five port Gigabit switch and the Amcrest 5MP UltraHD POE Camera. This required some soldering, splicing and heat shrink tubing. I’ll post some pictures of the connectors below.
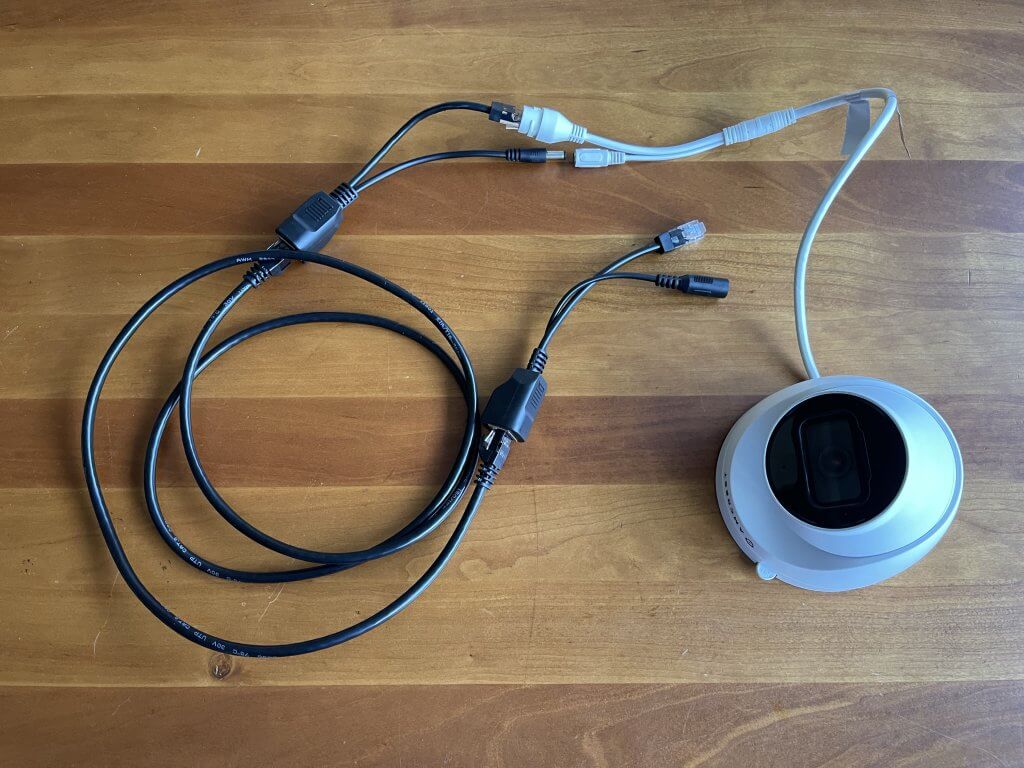
So if you look closely the right female pigtail goes to the gigabit switch and the 12volt power. I’m going to use the free toggle switch in the 12v electrical panel. The top center goes to the POE camera. Additionally, I may eventually replace the POE injector with a POE Switch. That’s really round two.
Network Gigabit Switch)
So I installed the Netgear GS308 five port Gigabit switch. Next I connected the Gigabit switch to the RayMarine-HS5-NS using the Raynet (F) to RJ45 (F) Adapter that I installed earlier. Additionally, the RayMarine Axiom 9 MFD uses the IP address range 10.0.0.0 – 10.255.255.255/8. There is no apparent way to change the DHCP range within the MFD. So for now I’m going to keep it as simple as possible and not introduce the Cradlepoint into the equation.
Amcrest 5MP UltraHD Camera
Next we have to connect the the camera to the the Netgear GS308 five port Gigabit switch. Now the camera uses Power Over Ethernet. I will use two of the passive ethernet cables and an ethernet cable between the passive POE injectors. Secondly, connect the Camera and one of the passive POE Injectors that has the male power end. Third, connect the ethernet cable and the Second passive POE injector with the female end to the power and the ethernet end to the switch. Lastly, if everything is working right you should have a link on the Netgear GS308 five port Gigabit switch. We do and everything is ready to see it this shows up on the RayMarine Axiom 9 RV.
RayMarine Axiom 9 RV – (Camera Verification)
So we will need to turn off the ONVIF authentication in the camera. I did this by connecting to the Wi-Fi network of the Axiom 9 RV. I had downloaded the Amcrest application prior to connecting to the camera network. Next, you will connect to the camera in P2P mode. You must disable the ONVIF authentication on the camera under settings for things to work correctly. Once you have done this go back to the MFD and go to settings and network. If everything is working you should see the camera under network device name as IPC as well as the Product.
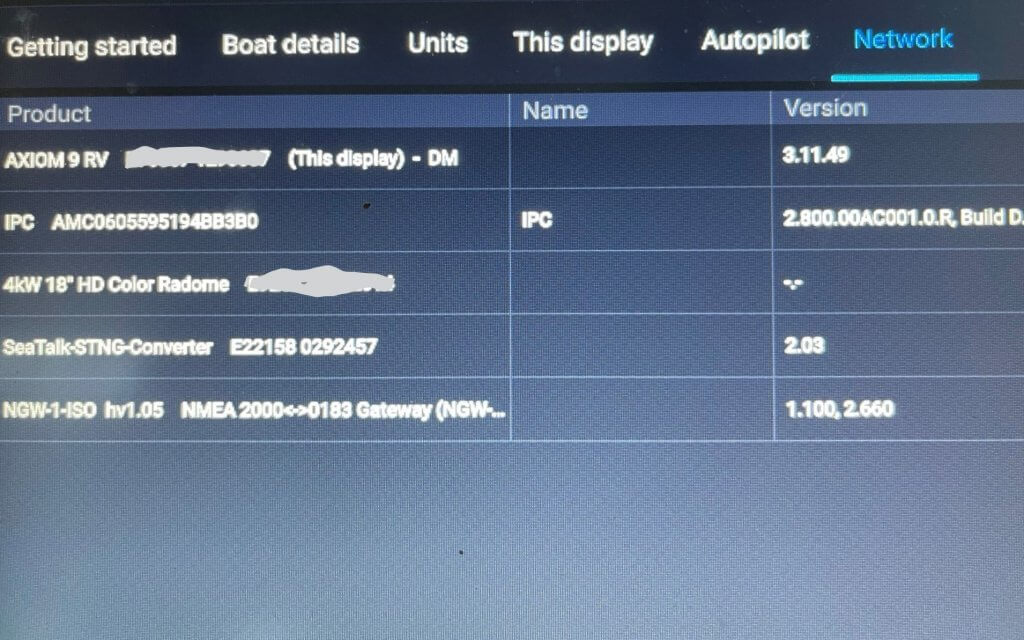
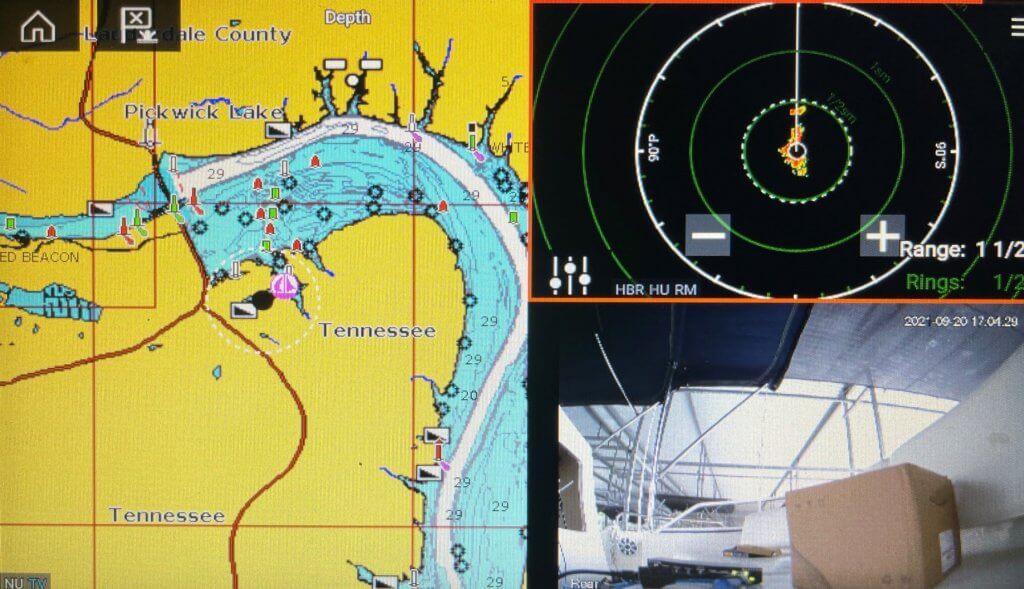
If all is correct you can see the camera on the Axiom. Scroll, left and pick one of the camera views. You should be able to see the camera. So this part of the configuration is successful.
RayMarine Axiom 9 RV – Part One Conclusion
So what we have learned that the RayMarine Axiom 9 RV it that can accept a third party camera. There was about two hundred dollars in parts. The next steps will be to get things buttoned up and the camera mounted. Additionally, I will move the Netgear GS308 five port Gigabit switch and the Cradlepoint router into the Salon. That will be the next in the series on how I get this all buttoned up. We also ordered two fox-marine MFEFI-3 engine gateways.
Hi.
I am trying to do a similar setup. But using.
Axiom 7
d-link dwr-921
HIK DS-2CD2142FWD-IS
I am using LH 4 newest version
The HIK do not have ONVIF
I have 2 major problems.
1 The Raymarine Axiom do not accept the HIK as a camera.
2 The Raymarine Axiom will not accept the d-link router as a DHCP host.
Have you any work arounds for this?
I would like
d-link as DHCP host for the whole boat
HIK camera view on MFD
HIK needs a static adress but this is easy from the d-link
I hope you have ran into the same problems an found a solution 🙂