Table of Contents
Steps to MerCruiser Starboard Head Reinstallation
In preparation for MerCruiser Starboard Head Reinstallation
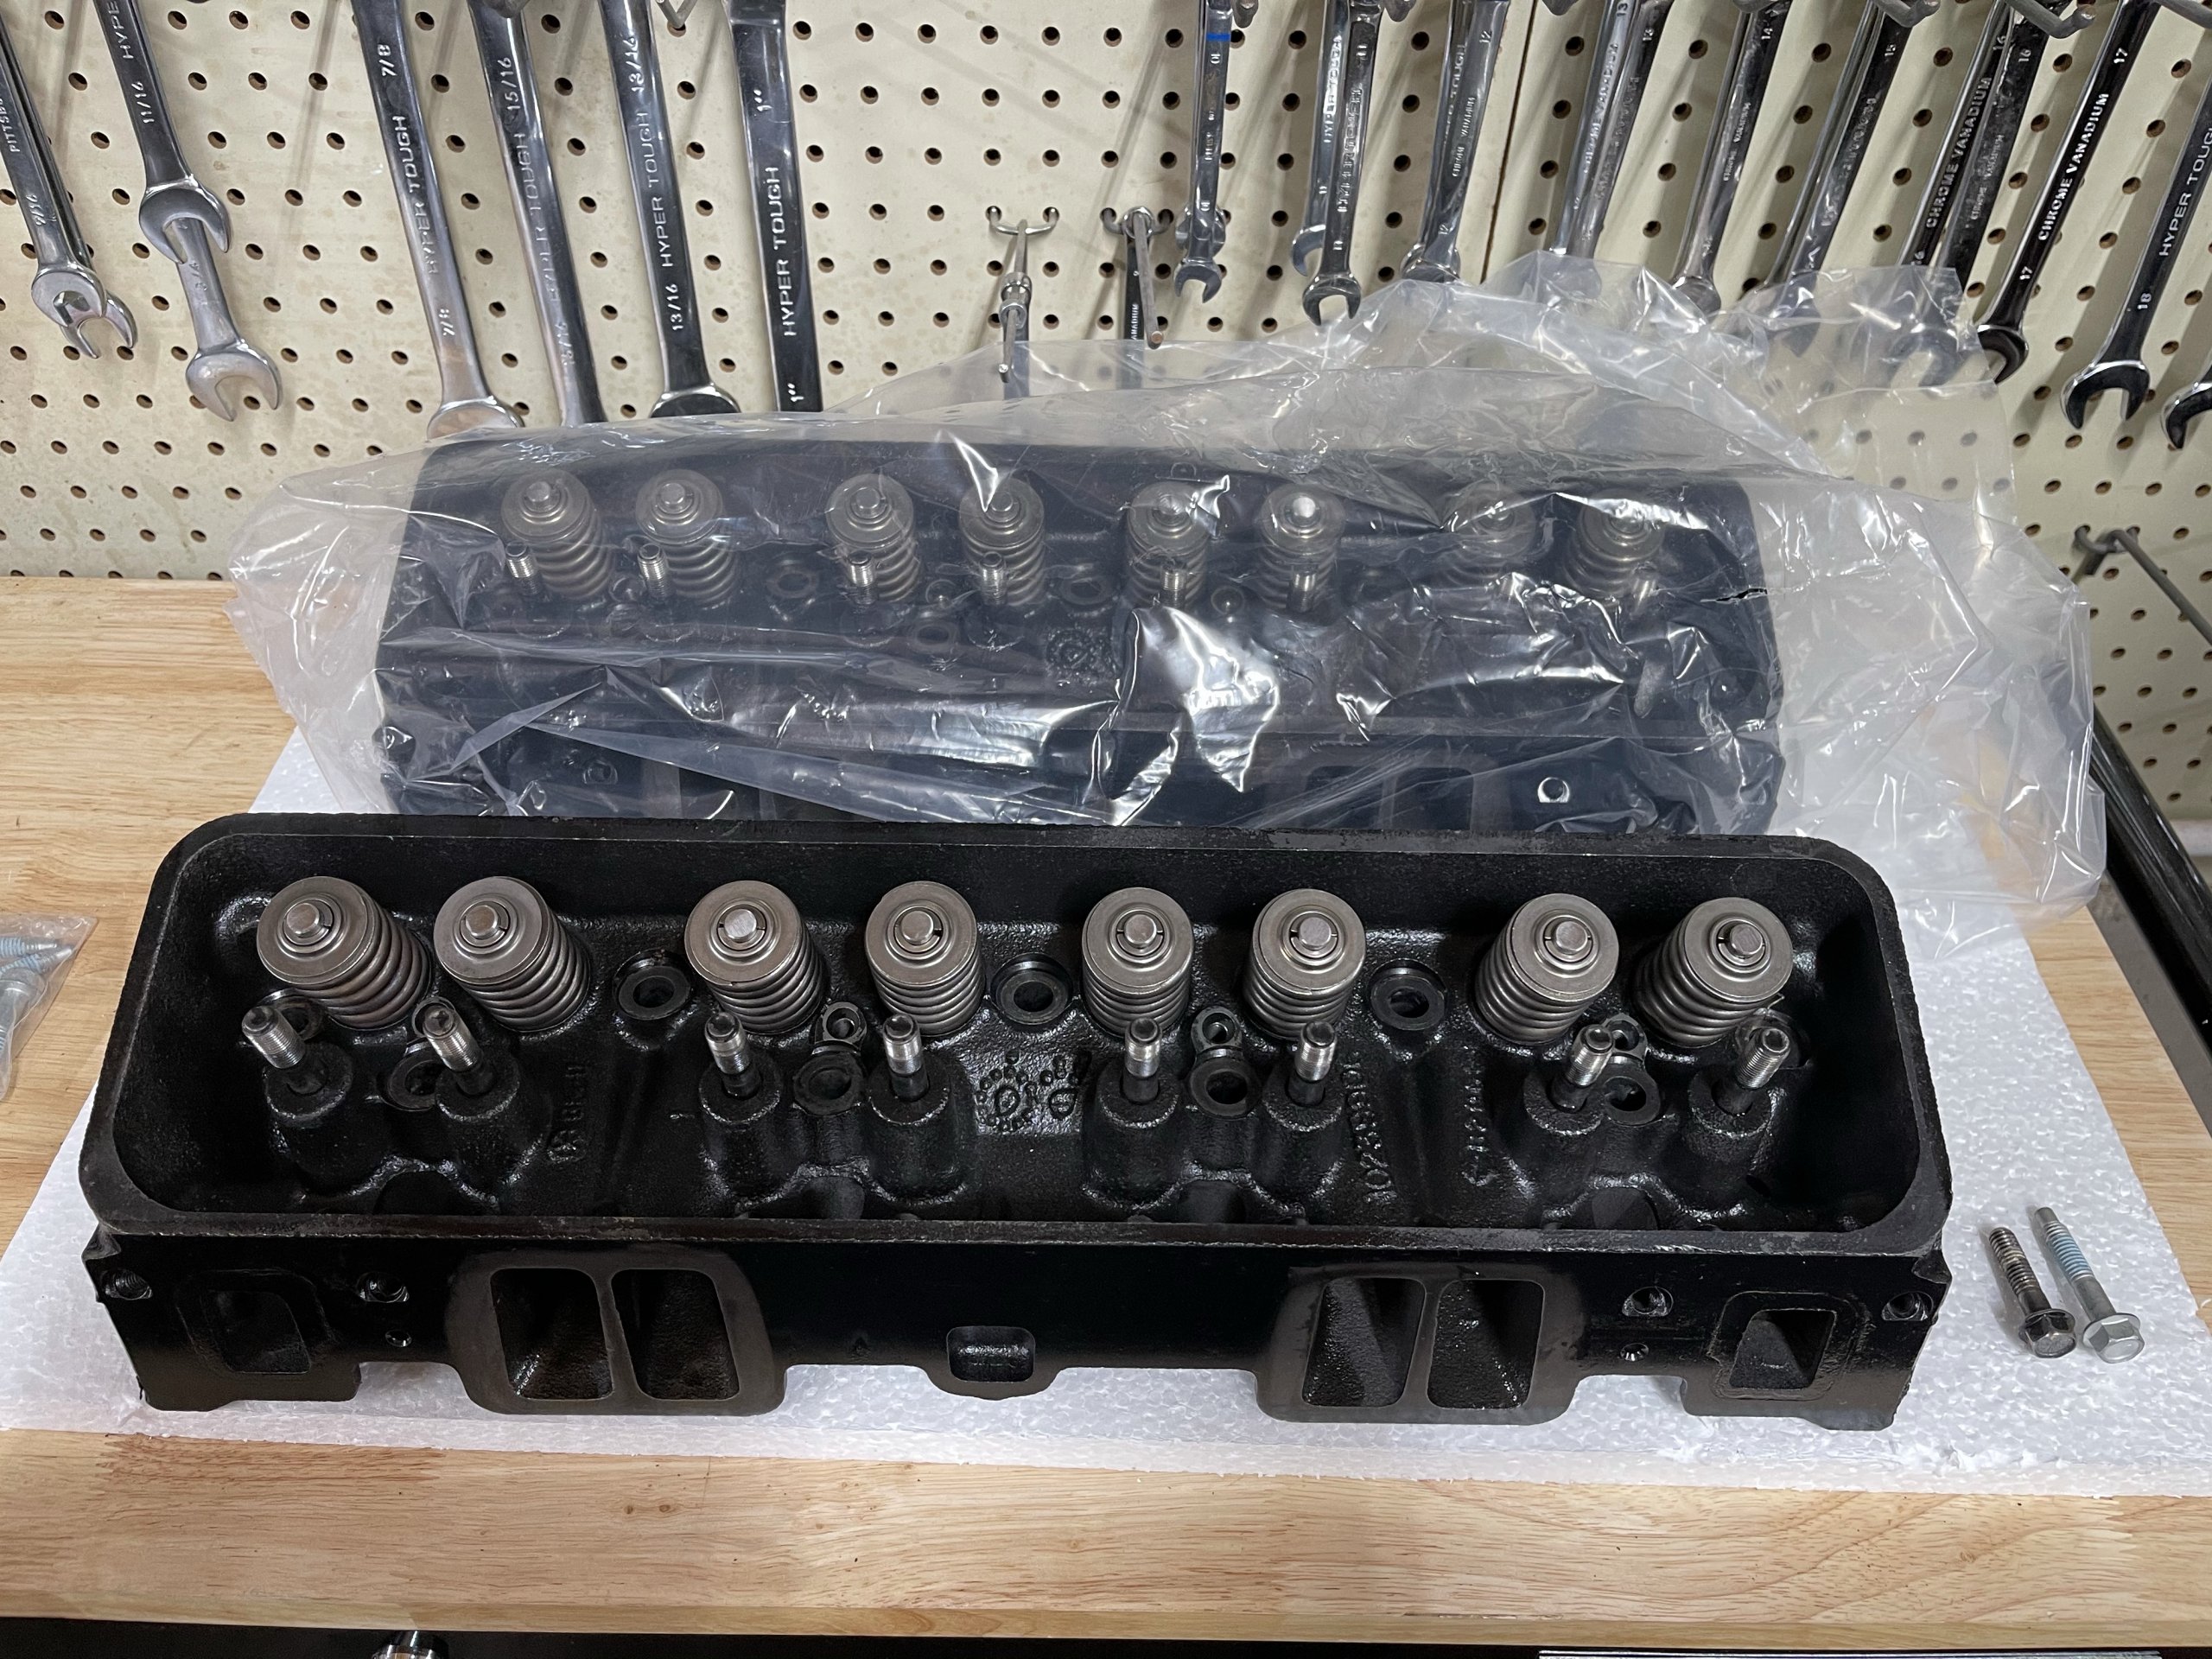
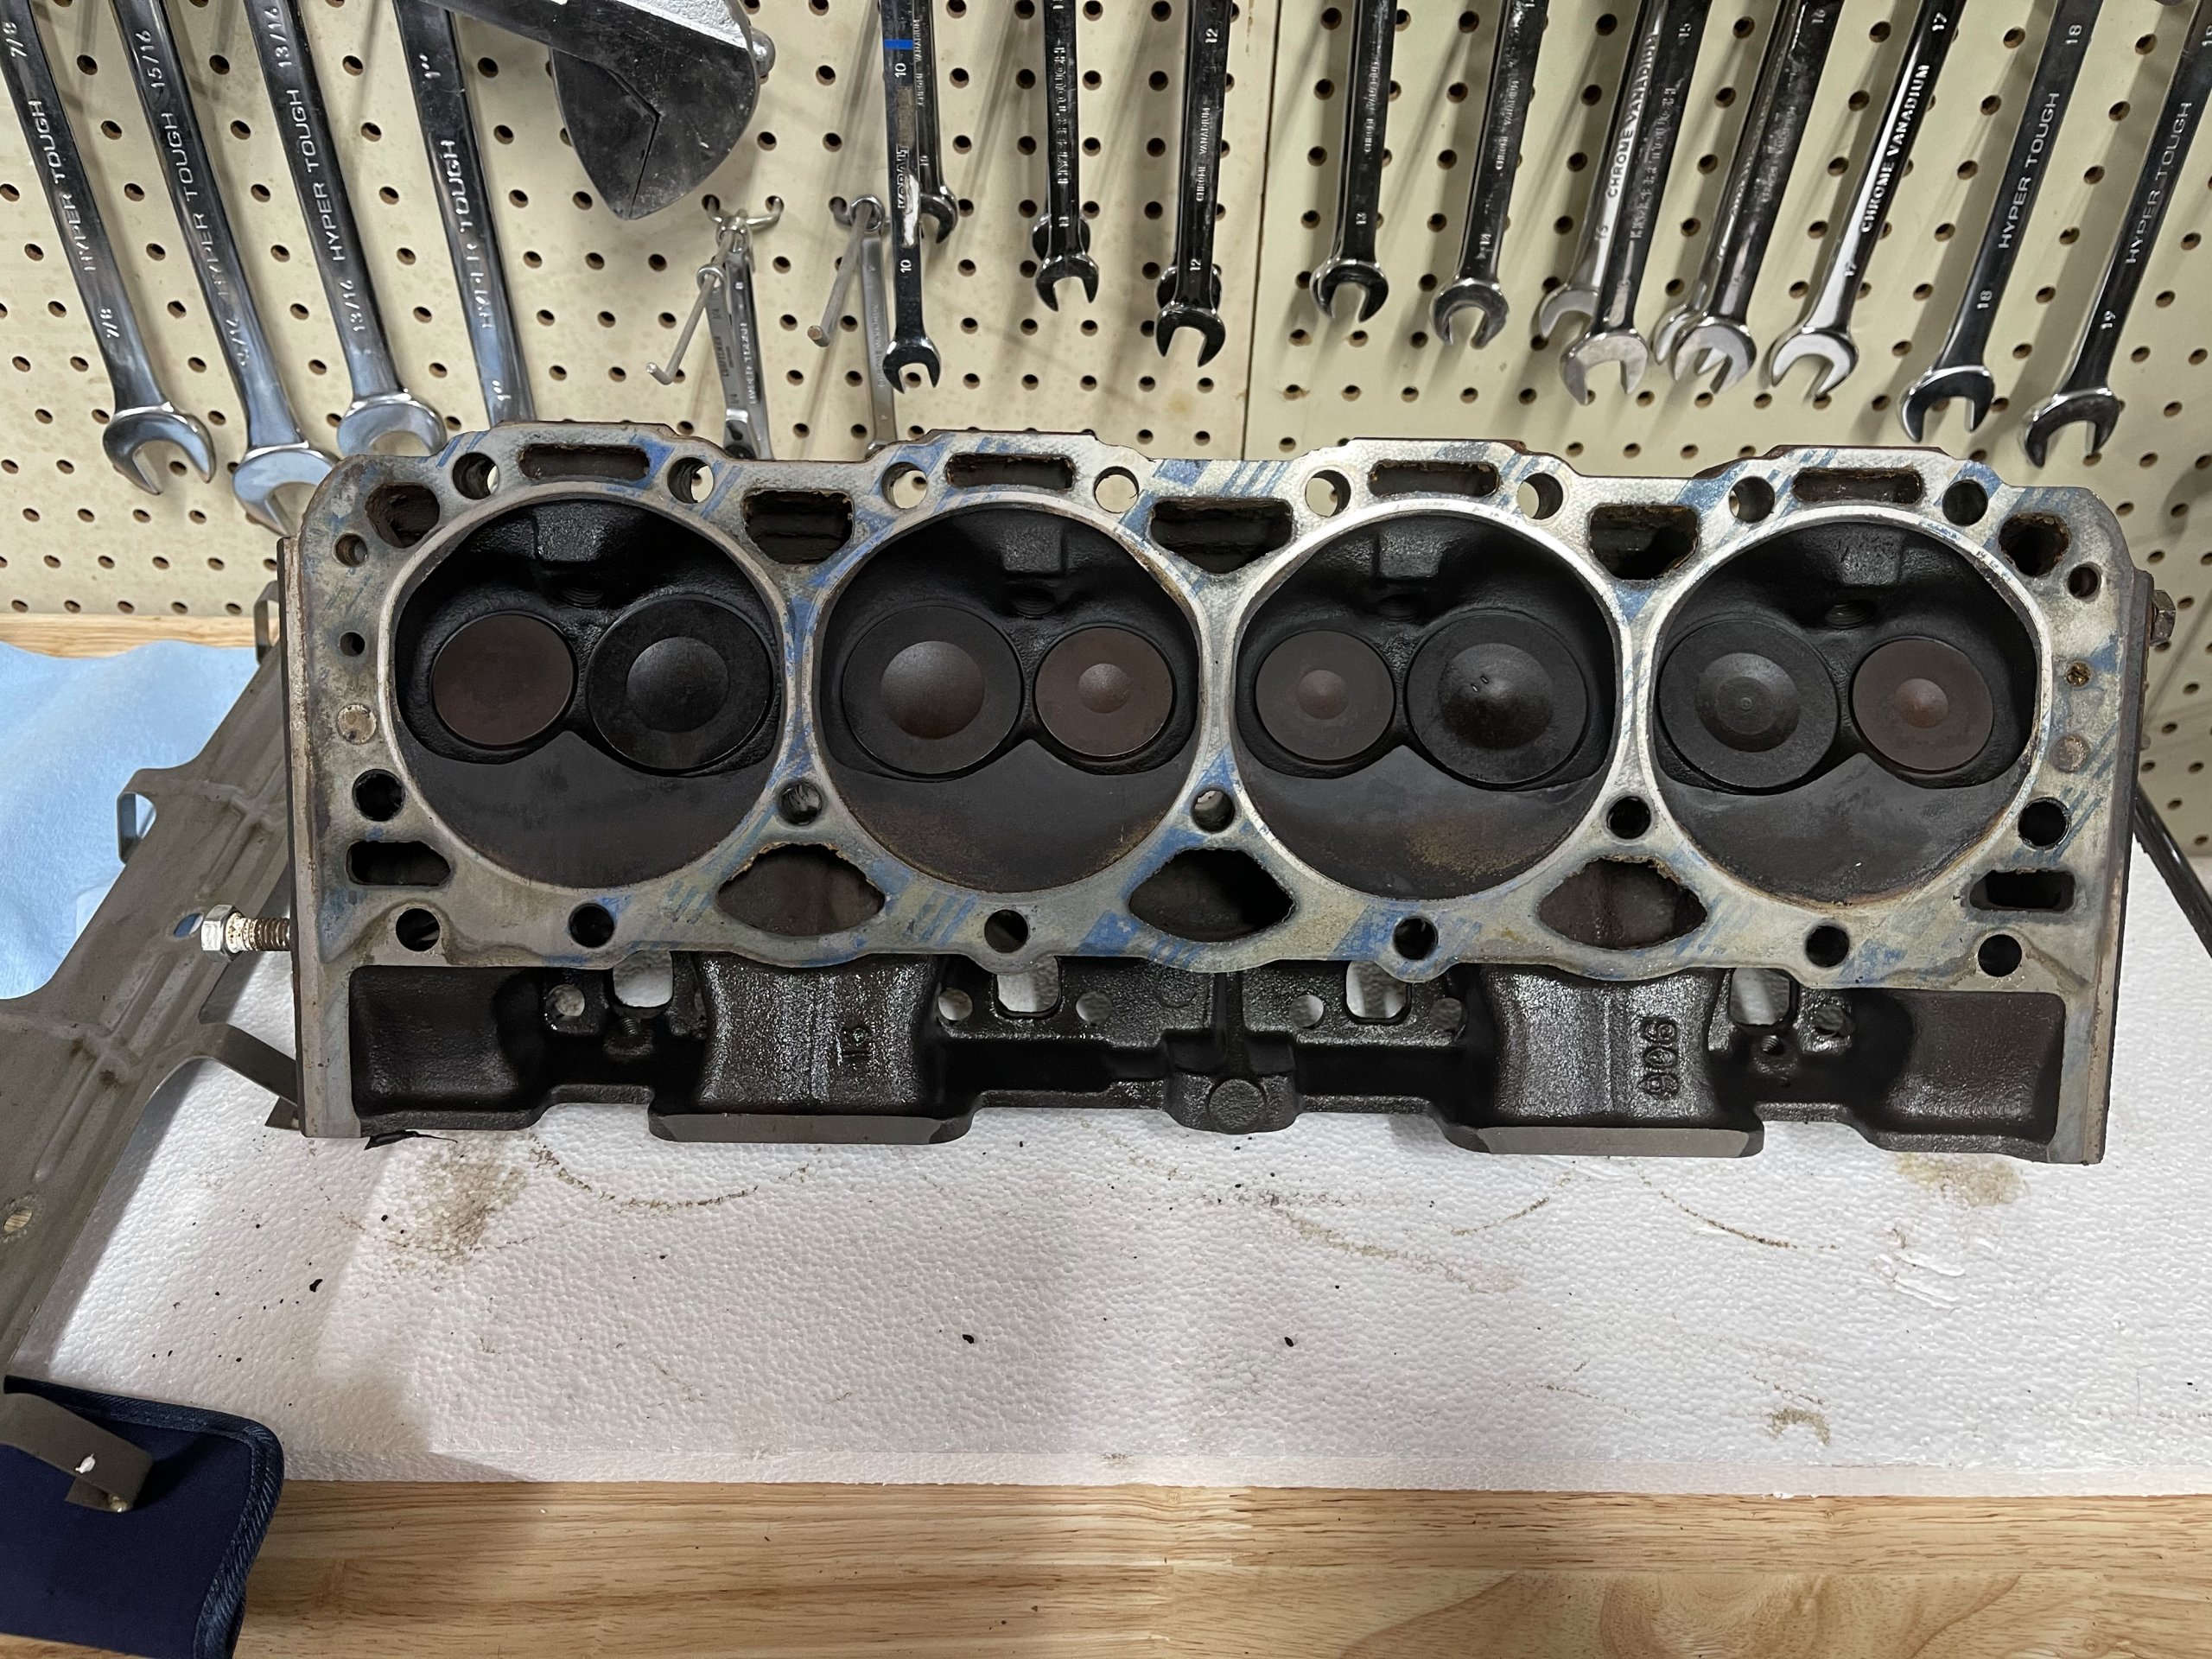
I just got the cylinder heads back from the machine shop. First, the heads were clearly from the original engine. They were in rough shape, to say the least. The intake and the exhaust valves, and seals were leaking. Additionally, the valve seats were cut with a drill and a grinding stone. This is apparently not the best way to seat valves? This likely saved my a$$ when I started the engine! Now there is a nice three-angle cut for the valves now. They seal nicely and don’t leak. This is the process of the MerCruiser Starboard Head Reinstallation. So Let’s start!
Checking the Cylinder Block Deck Run Out
It’s now time to check the block deck/cylinder head mating surface run out. So grab the manual and go to page 3A-32. It states in the manual that the should be no more than 0.05 mm (0.002 in.) of runout or flatness. You are going to need to have a machinist’s straight edge and feeler gauges.
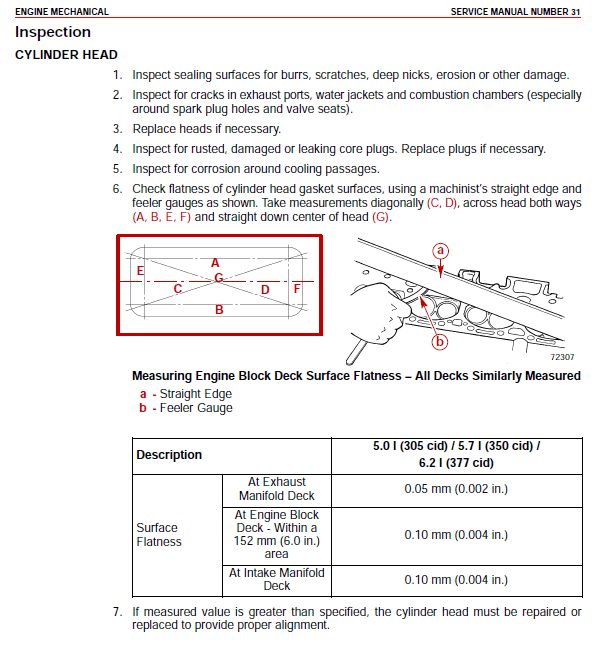
Additionally, you may be asking why I didn’t do this earlier. Well, the fact is the head was not warped. As a result, it is highly unlikely that the deck is warped. This all goes to the fact that I want to ensure that the surface I’m installing the starboard cylinder head on is within tolerance. Regardless of if the Fel-Pro Gaskets allow a greater tolerance! Lastly, it’s all within tolerance, so we proceed on to cleaning out the cylinder head bolt holes !
Cleaning the cylinder head bolt holes
Next in the process is we need to clean the cylinder head bolt holes. We will do this by using brake cleaner, a Microfiber Towel, and a 7/16-14 thread chase. Keep in mind this took quite some time. Apparently, the person who assembled the top end decided to use Permatex Indian Head Gasket Shellac Compound. I found this on all the old head bolts and rocker arms. Apparently, this is what is used for:
Permatex Indian Head Gasket Shellac Compound is a hard setting, slow drying liquid designed to coat, seal and repair most gaskets including felt, paper, rubber, and composition type gaskets. It seals metal gaskets and threaded connections for light duty service.
Cylinder Block Deck Preparation is Key
With that information, it’s clear that the heads were bound to fail in addition to a multitude of issues. Additionally, this may be the source of all the water intrusion into the motor. The cylinder head bolts protrude into the water jackets. It also probably means they reused the head gasket to. Sloppy work, to say the least! Additionally, keep In mind I have done about few cylinder heads on those Rotax 1503 motors. Head Gaskets take a beating and don’t really like to be mounted improperly. Lastly, If there is one thing to learn about this whole process. Preparation of the surfaces and proper mounting and torque sequence is key to getting this right.
The Bolt Cleaning Process
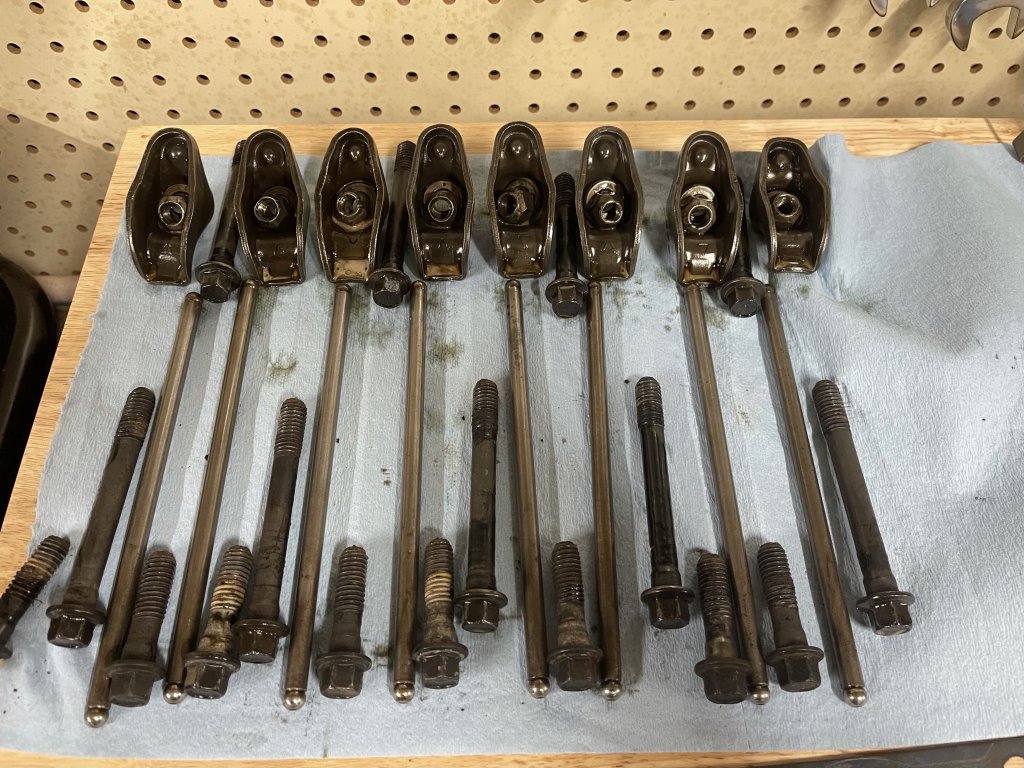
Firstly, what we do is spray brake cleaner in the bolt holes, and run a thread chase through the bolt holes. Secondly, I then remove the chase and clean it off with the microfiber towel. Third, I blow the bolt hole out and repeat the process till I get the bolt hole clean and not getting any trash back on the thread chase and the holes are not brown in my case. Lastly, I will run an old bolt through and repeat the cleaning process. as I said, it took a while because they used the shellac compound on the bolts. The bolts themselves should have PTFE sealant on them. If you look at this picture below, you can see there are only three short bolts that appear to have the correct sealant on them.
The new Fel-Pro bolts that I purchased have that already on them. It also appears that they reused the old cylinder head bolts. These are a fifteen-dollar item I would not skimp on. These also do not look like torque to yield bolts. Finally, I did not go with studs, I decided to go with just regular Fel-Pro SBC head bolts and nothing fancy.
Cleaning the Cylinder Block Deck
So up to this point we have cleaned out the bolt holes. Second, we have inspected the block’s deck and we are within tolerance. Now we will sprat the deck with brake cleaner and clean it with the microfiber towel. Keep in mind we want both surfaces to be clean of any thing that can prevent the head gasket from seating and sealing properly. Additionally, I don’t believe in too much cleaning. Remember, if we get this wrong, we will have to do this whole process over if the head gasket fails as a result of improper preparation.
Installing the Cylinder Head Gasket
With the deck cleaned, its now time to install the new head gasket. There are no markings on this gasket to indicate orientation. So I did a bit of googling and calling the machinist Steve. As result, I find out that the gasket should be placed on the deck with the Fel-Pro markings facing up. This Gasket is a 17030 from Fel-Pro. This is a Marine Grade Gasket. Unlike what was on it.
Installing the Starboard Cylinder Head
Now, with the Head Gasket Installed, Deck Cleaned, Deck Checked and Bolt holes cleaned. We are going to install the Cylinder Head. These heads are heavy and unwieldy at best. You have to place these on the block gently. As a result, I have to get correctly positioned in the bilge so I could place the Cylinder head down gently. Next time, I may use a strap to put the Port head on. Now, line the dowel pin on the front of the deck and back of the deck. Then pivot the head down from there. At first I was not positioned correctly and almost dropped the head on the block.
Cylinder Head Bolt Tightening Sequence
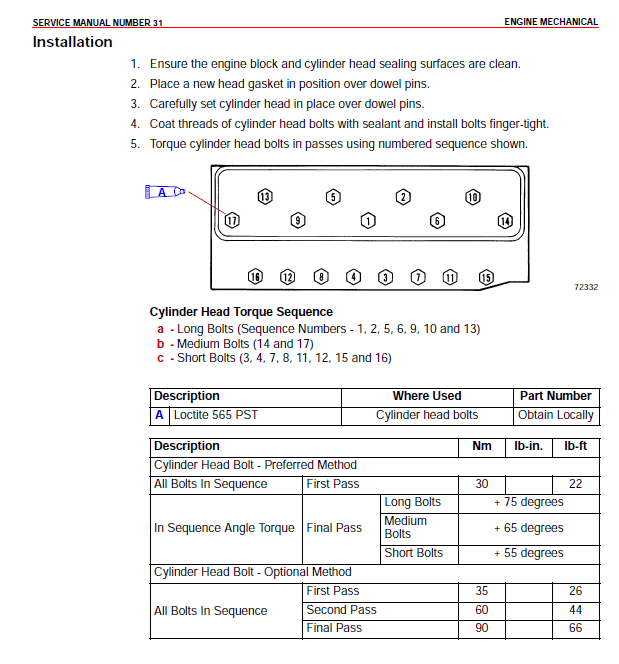
So we are at the point of installing the head bolts and tightening them down. There is a specific Sequence to do this on Page 3A-75. Now, It’s imperative that the sequence be followed correctly. There are seventeen of these bolts and they go in specific locations:
- (a) Seven Long Bolts
- (b) Two Mid Bolts
- (c) Eight Short Bolts
So we start at one and proceed to bolt seventeen. We are going to go through the process of tightening these in three passes initially. We are using the optional method. The head gasket had a procedure of waiting at least ten minutes and verifying the final torques settings. We have dinner with the folks up here that we consider family so its goin to be a short day for me. So we won’t be installing the rocker arms and push rods this week. I actually cleaned that shellac crap off of the rockers too. what a mess the top end of the motor was.
This article has 1 Comment